Friday, 23 December 2016

More head lining 3

The next phase of the head lining project is to finish off in the aft cabin I had already covered the sides of the coach roof and the under deck panels just leaving the roof to do. The first job was to cut out and stick the laminate panels on the inside of the forward bulkhead these were roughly shaped using a cardboard pattern and then finally trimmed and fitted in place with Evostick contact adhesive it can be a bit messy spreading the stuff on vertical surfaces the panel itself was easy just a matter of laying it flat pouring the stuff on and spreading it out.


Fitting the ply panel

The ply panel was roughed out using the cardboard pattern before being trimmed and fitted again using timber to hold it up. Once the panel fitted in a satisfactory manner it was taken home to have the lining carpet glued on.


Reverse side of panel with carpet glued on

The above photograph shows the reverse side before the edge had been folded back and glued down. Over the weekend I had sanded and varnished the timber trim ready to be installed.


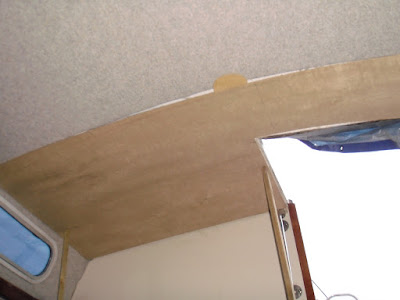
Roof panel in place

I have put some of the timber trim in place but unfortunately I am short of the correct length screws as the carpet is thicker than the original vinyl lining I need longer screws these are raised head countersunk self tappers which I have ordered but I expect that they are strike bound in a post office somewhere these will also be needed to complete the saloon timber trim. That is just about it for the head lining only the quarter berth left to do. The original locker front panels for the aft cabin are in pretty poor shape the glued on veneer is peeling off in places but the previous owner had cut out some new ply panels for this purpose which I have more or less decided to use instead of refurbishing the old ones the thought at the moment is to cover them with some more of the van lining carpet probably in a darker shade than the head lining watch this space. 


Friday, 9 December 2016

More head lining 2

The head lining is progressing at a satisfying rate I have now more or less finished the saloon it just needs the timber trim pieces sanding and varnishing I have identified most of them so that task will be this weekends homework project. The method has been the same as for the fore cabin so I will not bore you with another description but will show the photographs.


Fitting the forward panel in the saloon


Trial fitting of the aft ply panel

The round piece of ply to the left of the photograph is a temporary support for the forward panel. Because of the shape of the saloon, a lot wider than it is long its a bit difficult to get a good photograph of the whole head lining.


Fitting the aft panel

As with the forward panel it was necessary to use timber props to support the panel the aft panel is much more floppy than the forward one due to the cut out for the companion way. The join between the two panels is a bit more obvious in reality as the two panels naturally bend by different amounts once I have all the timber trim in place, which also supports the panels, I will possibly make a cover strip to go over the join. The the panels are secured to the timber roof stiffeners, which are glassed into the structure, with stainless steel cups and screws.


Monday, 5 December 2016