Friday 28 August 2020

Bored with sanding

I started out this week with every intention of finishing the first round of sanding on the forward cabin and heads soles however after a good start I started looking around for something else to do to relieve the monotony for a while. I decided to try and do something with the cockpit sole, it is covered with treadmaster which while being physically in reasonable condition it had a lot of paint, glue, sealant, varnish etc splashes all over some of which I will admit responsibility for others I shall deny all knowledge of. Also it needed a good scrub to remove the dirt and algae. Some time ago number two daughter bought me some 'Drill Brushes' and these proved to be ideal for cleaning between the diamond tread, I used the brush wet with soapy water, and although I used a red grade of brush which is upper mid in terms of stiffness there was no damage to the treadmaster.


The tools

The drill is an old Bosch 9.6v cordless I have had it for about 15 years and like most of these things the batteries gave up the ghost but the actual drill is still going strong so I put a flex on it and use it directly connected to the boat's battery and so far the extra volts have not had any detrimental effect on the drill motor.


Treadmaster after scrubbing

As can be seen the brush did not affect the paint etc as was to be expected but I found that this could be easily removed by rubbing gently with some 60 grit sandpaper.


After removing paint etc

There are some slightly lighter patches where the paint was sanded, they don't show up in the photograph but I am expecting them to darken down to match the rest with wear and exposure to the atmosphere. In an ideal world I would probably replace the treadmaster with fake teak but it is much improved and will suffice for the time being. Next week I will have to get back to the sanding.


Friday 14 August 2020

Sanding

This week has been taken up with sanding the heads and forward cabin soles, it is a bit of a long slow process starting off with 320 grit wet and dry with the aim of working through to 600 grit. It would be a lot quicker to power sand at least for the initial levelling up but the dust gets everywhere and I am not too keen on wet sanding with a mains voltage machine. I have come across a few spots where there are high spots in the layup which will require the further application of flocoat once the preliminary sanding has been completed, the forward cabin being the worst affected I think that this was due to the 450g biaxial cloth being a bit too heavy and the consequent problems with forming it around the bilge access opening.


Forward cabin sole showing high spots in the layup


Heads sole still a way to go

It looks as though the first round of sanding will take most of my time next week.


Friday 7 August 2020

Forward cabin sole

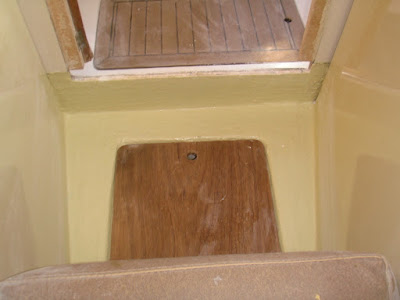
The first task this week was to gelcoat the forward cabin sole this was carried out in the same manner as the heads sole, two coats of gelcoat finished with a coat of flocoat, hopefully to give sufficient thickness to allow for sanding back and final polishing.


Sole after gelcoating

The colour match is not perfect but should be acceptable for the sole it would stick out a bit if used for a repair in the middle of a panel.


Colour match

I hope that when sanded and polished the new gelcoat will blend a little better with the old I am by no means a gelcoat expert so would not attempt a perfect colour match. It is possible tht the original has faded a bit in 45 years and originally  was a bit closer to the new. For the rest of the week I have been sanding the heads sole using various grades of wet and dry paper, this is a bit slow and laborious but makes a lot less mess than power sanding, I have already cleaned up a lot of dust from the original sanding and fairing. Also with power sanding it is all too easy to go through the gelcoat so I will stick with the hand sanding. I have found a couple of areas where the gelcoat was a bit thin and will need some over coating and sanding.