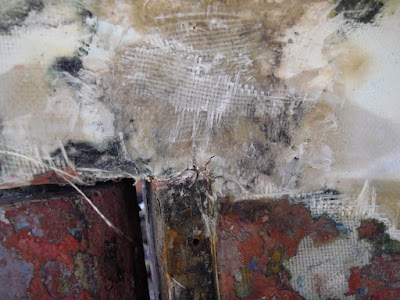
The suspect repair
As time was moving on and while the weather is still suitable for GRP work I decided to bite the bullet and get on with sorting it out and so after a little bit of effort with a screwdriver and a chisel resulted in the whole lump dropping off.
As can be seen most of the patch was stuck to antifoul with only a small area which had been cleaned back to gel coat. It would appear that the original problem had been cracks in the gel coat which seems to be on top of what looks like some sort of filler which appears to be quite thick. These cracks do not look to be very extensive.
Cracks on starboard side
On the port side I used a chisel to remove some of the gel coat and filler to get an idea of the depth of the cracks.
After digging out the cracks on port side
The plan is grind back until the cracks have been removed and then do a proper lay up repair with epoxy and glass mat. There are a number of cracks in the gel coat further down the skeg which I intend to grind out and make good at the same time I am not sure whether the cracks are due to flexing of the skeg or impact damage there doesn't seem to be any cracks in the subsequent repair poor as it is so I am assuming that it was probably some sort of impact damage.
The other job which I had been putting off was the installation of the heads discharge sea cock after much thought I decided that I would use a Marelon plastic one after all as for the rest of the sea cocks which I had already replaced. I had been seriously considering using, at horrendous cost, a Blake's bronze taper plug cock. After obtaining the Marelon cock it became obvious, as I had thought it would, that it was not going to fit in the original position without cutting away the internal moulding in the heads and also the hose installation would have been something of a dogs breakfast as it would have been above the level of the moulding.
New sea cock in original position
The above photograph indicates the amount of the internal moulding that would have to have been cut out as the cock is not even centred over the hole in the hull. I don't know what was there originally as I don't think that an 11/2" Blake's cock would have fitted in the available space and allowed a tidy hose installation also the original only had three bolts to secure it whereas a 11/2" Blake's has a four bolt flange. I suppose there is always some reluctance to cut more holes in a perfectly good boat but I could see no other way so out with the 2" hole saw. I cut out and fitted a new ply backing pad with some thickened up epoxy it needed a bit as the hull is curved at this point and the pad is flat.
Hole cut out and backing pad epoxied on
Once the epoxy had cured I cut the skin fitting to length and test fitted the sea cock the new position will be at the bottom of the wet locker on the outboard side of the heads.
Trial fitting of the sea cock
After proving the fit of the cock I removed it and gave the backing pad and the opening a coat of thickened epoxy just to seal everything up.
I also took out the skin fitting for the old paddle wheel log I prefer to work on speed over the ground from the GPS also as the boat will be in a mud berth the paddle wheel tends to get choked up with best Swale mud also I don't seem to have the head end instrument. All that is left to do now is make good the redundant holes


No comments:
Post a Comment