Friday 22 September 2017

External cosmetic work

A bit of a short post this week but as mentioned last week I started on the external cosmetic work with a promising weather forecast for fibreglass work in the offing. When I bought the boat I was aware of some cracks in the gelcoat on the port bow they did not look like your usual run of the mill stress cracks so this is where I started.


Cracks on port bow

After a bit of prodding it turned out that there was some delamination in this area or probably more to the point it was not properly laminated in the first place as the gelcoat was easily pried away along with the chopped strand mat immediately behind it most of which showed a distinct lack of resin perhaps this part of the operation was reached on a Friday afternoon anyway I carried on removing the stuff until I got back to good solid laminate.


Extent of the problem

I then chamfered down the edges of the area and removed all the suspect chopped strand mat, gave the whole area a good sanding then cleaned everything up with acetone ready to start laying up some new glass cloth and epoxy resin. I was going to use paper templates and then pre cut the glass cloth to size but in the end I cut the cloth a bit over size and once the epoxy had cured just trimmed off the excess and sanded along the edge. 


Close of play today

I used some offcuts of 4mm ply left over from the headlining panels to produce some templates from the starboard bow as particularly on the sharp edge at the top of the flair requires quite a lot of building up. This sharp edge in my humble opinion is a poor design feature as there was a small void where the chopped strand mat met the inside of the edge this was exacerbated by the shortage of resin in this area. From the photograph there is still some more glass work required at the upper edge of the flair the blue painted area is glassed up to the required level but will require some filling and fairing to give a decent finish the aim is to get the rest of the new glass laid up on Monday as I will be away for the rest of the week.

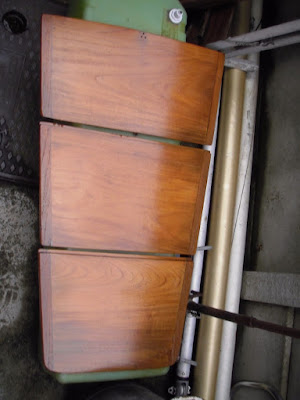
I also finished the aft cabin washboards this week on the face of it there doesn't seem to be a great deal of progress made but the glass fibre work seemed to be progressing slowly but I did have to take some time out to procure additional materials but that's the nature of these projects sometimes they go forward in leaps and bounds and at other times progress seems painfully slow.


Aft cabin washboards back in place


Friday 15 September 2017

Oil leak, washboards etc

I put a third and final coat of  International Woodskin on the saloon washboards over last weekend so that I could put them back on Monday morning this has improved the appearance of the cockpit considerably.


Saloon washboards

My original intention had been to cut down the temporary washboard that I had made fore the saloon companionway to fit the aft cabin companionway however I found some off cuts of ply sufficient for the aft cabin so cut out a temporary set of washboards so that I could take the boards home and refurbish them. Doing the job this way gives me a complete set of temporary washboards should I need them in the future.


Aft cabin temporary washboards

The final job for Monday was to repair the oil leak on the gearbox control valve this was a straightforward job after disconnecting the teleflex control cable it was a matter of removing four nuts and lifting off the control valve. On inspection it was only the joint between the valve and the gearbox that was leaking so just a matter of making a new gasket and replacing the valve. Once the valve had been replaced I started the engine and success the oil leak was no more.


The control valve is the piece connected to the grey teleflex cable just left and above centre of the above photograph.

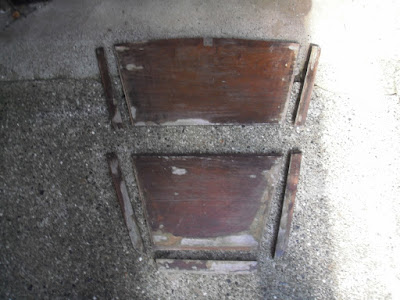
The current homework job is to refurbish the aft cabin washboards I have dismantled them just required a gentle tap with a mallet as all the glue joints had failed.


Aft cabin washboards dismantled

The next part of the job will be to remove all the old varnish/wood stain and reassemble the boards ready for the application of three coats of International Woodskin.

On Wednesday I began by fitting a plywood backing pad for a new skin fitting for the gas locker drain the existing drain discharges into the cockpit which is most unsatisfactory as the cockpit drains discharge below the waterline which would mean any leaking liquid gas would remain in the cockpit.


Existing gas locker drain

Once this was done and while the epoxy was curing I set too and had a good clean up of the cockpit as a lot of work had been carried out there it was becoming a bit of a mess with glue, paint and varnish drips also a number of holes had been quickly filled to keep out the rain these required fairing. I started by giving all the white gelcoat areas a rough sanding to remove the drips and excess epoxy from the repairs I looks much cleaner now but it will still require a cut and polish to finish it off. The non slip areas still need to be addressed they are a mixture of trakmark and non slip paint the trakmark is not in good condition much of it is peeling off I need to decide whether or not to replace it or remove it all and apply some non slip deck paint.


Cockpit after cleaning up

Today I began by installing the new skin fitting for the gas locker drain and then just a matter of fitting the hose to connect the locker with the skin fitting.


New skin fitting


Drain hose

Once the gas locker drain was completed I installed the discharge pipe from the saloon bilge pump to the discharge skin fitting in the heads hanging locker I require a new strum box and pump overhaul kit so that I can complete the installation.


Saloon bilge pump and discharge hose

Yesterday I obtained some 'P' clips to secure the fuel tank vent hose to the bulkhead to retain a loop to prevent any water running back down the vent to the tank.


Fuel tank vent hose loop

There are two fuel tank vent fittings in the photograph I am assuming that perhaps the boat had two fuel tanks at some time although when I got her they had both been removed.

Next week the plan is to get on with some external cosmetic repairs while the weather is still suitable for such work there are a number of areas on the topsides that require some attention.


Friday 8 September 2017

Another milestone passed

I did not post last week as I was away on a sailing trip but I did get the saloon washboards glued up and sanded ready for finishing before I left. I used thickened epoxy to glue the parts together after cleaning with acetone and priming the joints with straight epoxy.


Washboards sanded ready for finishing

This week I had decided to get the engine up and running but before I could do that I spent some time trying to get the oil pressure gauge working when switching on the engine panel the gauge went full scale. After checking out the wiring it appeared that there was a problem with connections somewhere so I cut off the end of the cable at the pressure sender and crimped on some new insulated female spade connectors an voila the oil pressure gauge went to zero pressure on switching on. 

After putting some fuel in the tank and venting the fuel system I managed to get the engine to start and run at idle speed I could not let it run for too long as I needed a raw water supply to cool the exhaust however I was satisfied with the way it ran there is a small fuel leak to repair and an oil leak on the gearbox control valve, this engine has a hydraulic gearbox, it looks like a case of new gaskets for the control valve which is as far as I can see a fairly simple operation.

Today I rigged up a water supply to the raw water side of the cooling system and fitted the raw water pump impeller. The raw water supply was a fresh water hose into a bucket with a temporary hose from the raw water pump into the bucket I would not connect the water supply hose direct to the raw water pump as it is possible to flood the engine through the exhaust elbow. The engine started straight away once I had remembered to push the engine stop knob back to the run position. I found that at idle speed the supply hose would fill the bucket so every so often I had to give the engine a bit more throttle to stop the bucket overflowing.


Engine running and pumping water

Again the engine ran well with no smoking I ran it for over an hour and it came up to operating temperature and after lubricating the cutlass bearing with some washing up liquid I tried ahead and astern gears without any problems. The oil pressure gauge went back to showing a full scale deflection again but after moving the wiring harness about it reverted to showing the oil pressure although it reads 87psi which is a bit on the high side the book says 30-60psi at maximum revs and normal operating temperature, in light of the problems experienced with the gauge I tend to think that this is a gauge malfunction sometime I will completely rewire the gauge, it is of course possible that the gauge and sender are not compatible as the sender I believe is original but at sometime the gauge head has been replaced albeit with a VDO manufactured unit. 

The alternator seems to be functioning correctly and charging the battery once the revs are increased above 1000rpm.


Revs increased above 1000rpm battery charging

Apart from a couple of minor leaks I now have an operational engine which is the next major milestone along this project which is very satisfying given that I had not seen the engine run when I bought the boat. In between working on the engine I managed to get a couple of coats of International Woodskin on the saloon washboards I was hoping to get the final coat on today but the weather was not going to play ball so I will complete them at home this weekend.


Saloon washboards awaiting final coat

I have been using International Woodskin for sometime on exterior bright work as I find it is a lot more durable than varnish I doesn't have the deep gloss of varnish but it is a lot less work which I can live with.