Saloon washboards
My original intention had been to cut down the temporary washboard that I had made fore the saloon companionway to fit the aft cabin companionway however I found some off cuts of ply sufficient for the aft cabin so cut out a temporary set of washboards so that I could take the boards home and refurbish them. Doing the job this way gives me a complete set of temporary washboards should I need them in the future.
Aft cabin temporary washboards
The final job for Monday was to repair the oil leak on the gearbox control valve this was a straightforward job after disconnecting the teleflex control cable it was a matter of removing four nuts and lifting off the control valve. On inspection it was only the joint between the valve and the gearbox that was leaking so just a matter of making a new gasket and replacing the valve. Once the valve had been replaced I started the engine and success the oil leak was no more.
The control valve is the piece connected to the grey teleflex cable just left and above centre of the above photograph.
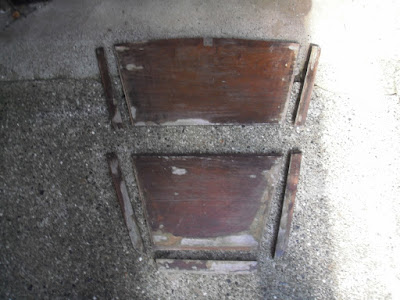
The current homework job is to refurbish the aft cabin washboards I have dismantled them just required a gentle tap with a mallet as all the glue joints had failed.
Aft cabin washboards dismantled
The next part of the job will be to remove all the old varnish/wood stain and reassemble the boards ready for the application of three coats of International Woodskin.
On Wednesday I began by fitting a plywood backing pad for a new skin fitting for the gas locker drain the existing drain discharges into the cockpit which is most unsatisfactory as the cockpit drains discharge below the waterline which would mean any leaking liquid gas would remain in the cockpit.
Existing gas locker drain
Once this was done and while the epoxy was curing I set too and had a good clean up of the cockpit as a lot of work had been carried out there it was becoming a bit of a mess with glue, paint and varnish drips also a number of holes had been quickly filled to keep out the rain these required fairing. I started by giving all the white gelcoat areas a rough sanding to remove the drips and excess epoxy from the repairs I looks much cleaner now but it will still require a cut and polish to finish it off. The non slip areas still need to be addressed they are a mixture of trakmark and non slip paint the trakmark is not in good condition much of it is peeling off I need to decide whether or not to replace it or remove it all and apply some non slip deck paint.
Cockpit after cleaning up
Today I began by installing the new skin fitting for the gas locker drain and then just a matter of fitting the hose to connect the locker with the skin fitting.
New skin fitting
Drain hose
Once the gas locker drain was completed I installed the discharge pipe from the saloon bilge pump to the discharge skin fitting in the heads hanging locker I require a new strum box and pump overhaul kit so that I can complete the installation.
Saloon bilge pump and discharge hose
Yesterday I obtained some 'P' clips to secure the fuel tank vent hose to the bulkhead to retain a loop to prevent any water running back down the vent to the tank.
Fuel tank vent hose loop
There are two fuel tank vent fittings in the photograph I am assuming that perhaps the boat had two fuel tanks at some time although when I got her they had both been removed.
Next week the plan is to get on with some external cosmetic repairs while the weather is still suitable for such work there are a number of areas on the topsides that require some attention.


No comments:
Post a Comment