Friday 23 October 2020

Lift out

 I started this week by taking off the sails and the spray hood ready for lifting out on Wednesday, as I had an appointment with the coronary rehab team on Wednesday the plan was to move the boat round to the lift out berth on Tuesday afternoon. Once the berth was clear I fired up the engine and tried to get the stern to swing to starboard using the prop walk, however there was quite a stiff southerly blowing which was causing the stern to swing to port and the prop walk would not overcome this. I think that the problem is that New Morning only has a 12"x7" propeller as the engine has a 1:1 gearbox great for reducing the drag when sailing but just when prop walk might be useful its not there. In the end I had to go down the creek to a wider part and turn round, travel half a mile to cover 50 yards. I went over to Conyer today to find New Morning lifted out, pressure washed and sitting in a cradle so I got on with cleaning and stowing the fenders and stowing the mooring lines before conducting an inspection of the hull below the waterline, the first time I had seen it in over two years, it all looked pretty good apart from the brown east coast mud deposits which are like concrete. The keel looks good with no rust showing, it had a good dose of rust converter and two coats of underwater primer before anti fouling. 


East coast mud

Before New Morning was launched I had to remove a very poor repair to the base of the skeg, it did not take a lot of effort, in fact the whole lump just fell off this was detailed in a much earlier post, I then ground out the defective GRP before building op the base of the skeg with woven rovings and epoxy and on inspection it would appear that it was a successful repair.


As can bee seen from the photographs above some of the anti fouling has fallen off but the skeg repair is still sound. The cutlass bearing is good for further service but the shaft anode has disappeared so will need to be replaced. The hull anode is showing some wastage but is probably fit for further service. So really all that is required this winter will be a scrape down to remove the mud deposits and a new shaft anode.


Propeller shaft and hull anode


Friday 16 October 2020

Went sailing today

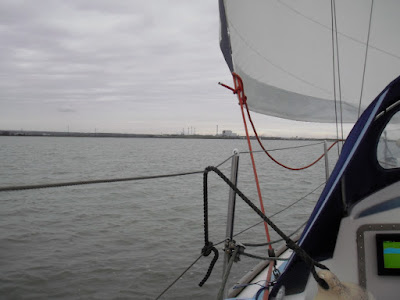
I started this week by having another look at the wind instruments, I checked the continuity of the cables as far as the connection box in the heads, there seems to be no problem up to this point it looks as though the problem is either in the mast or at the masthead but I am not taking it down just for that. I finished sanding the forward cabin sole it is just needing the final coat of flocoat. With the lift out programmed for next Wednesday I decided to go for a final sail, with a Northerly 2 or 3 it was not too bad although some sunshine would have been been welcome.


The last photograph is the new waste to energy plant at Kemsley looks as though part of it has been built with 'Lego' bricks.


Friday 9 October 2020

Short post this week

 I have done a little more sanding to the forward cabin sole however I am suffering from a bit of a low boredom threshold with sanding so I decided to fix an outstanding issue with the engine stop cable. Before I got the engine running I had replaced the original engine stop cable with a new one, the original cable was a bowden cable and it was getting pretty frayed, the new one is a solid Morse type cable but it did not have the usual ferrule at the end of the outer sheath and while the engine stop function worked perfectly well but when pushing the knob back in to reset the stop all that happened was that the outer sheath moved so the stop lever had to be reset by hand before restarting the engine, this all worked OK in fact it was probably a good way of immobilising the engine provided that you remembered to do the reset. On further investigation I found that the stop lever return spring was too long so that even in the stop position there was insufficient tension in the spring to return the lever. I started by removing the spring and cutting about three-quarters of an inch off it before forming a new eye on the end. Replacing the spring was a bit tricky as it is behind the fuel rack return spring but after some perseverance I managed to refit it.


I cut this much off the spring


Arrangement of the stop cable

As can bee seen from the above photograph that the cable connection to the stop lever does not allow for push pull operation. As a belt and braces I secured the cable outer sheath at a couple of points on the engine, the stop lever now works as intended no need for a manual reset. I had thought of fitting a stop solenoid but as can bee seen there is not much space and I am all in favour of keeping things simple where possible.


Friday 2 October 2020

Back to sanding

 Not a lot to write about this week I am afraid I was hoping that I would be able to get out into the Swale for a couple of hours at least once this week but the weather has been atrocious on the days that I had available such is life. The first task this week was to finish applying the varnish to the the shelf etc for the bookshelf behind the dinette seat back.


Bookshelf


Cover for lower opening

Covering the lower opening and fitting the bookshelf does help reduce the noise from the domestic water pump which is mounted in the space below but as it is mounted on a fairly thin plywood bulkhead it is still quite intrusive, requires further investigation. For the rest of my time this week I have been sanding the new gelcoat on the forward cabin sole although I must admit that I have not been overly enthusiastic about it but having said that it is almost ready for the final coat of flocoat. I had been quietly pleased that the reinforcement of the heads sole had stopped it creaking however there was an annoying creak from the bilge access cover and after some investigation I found that when applying the gelcoat i had left a bit of a blob in the recess so that the cover was jamming when any weight was applied five minutes with some coarse sandpaper soon sorted it. That is it for this week I have booked for a lift out on the 21st October I was hoping to do it last winter but I was a bit late trying to book it and all space in the yard and the cradles were taken, so plan B was to do it in Marsh this year but the Chinese flu got in the way so hoping that it all goes according to plan this time.


Friday 25 September 2020

Light bulb moment

 While I was in the shower contemplating the meaning of life I had a light bulb moment or should that have been a Homer Simpson 'doh' moment, the reason for the need to swap over the autopilot motor power leads had nothing to do with the motor having been replaced but the fact that the tiller that it operates on is mounted aft of the rudder stock so that the actuator needs to move in the opposite direction to give the correct rudder movement.

I started this week by making the shelf for the space behind the dinette and also a cover to go down at the bottom of the space which has an opening into the calorifier space, these now require varnishing which I have started and will add further coats next week. I then went on to clean up the bulkhead inside the space it had previously been lined with something possibly the same textured vinyl that was used on the remainder of the saloon bulkheads, the adhesive appeared to possibly be some form of latex which scraped off fairly easily. I gave the bulkhead a sanding and used some spray contact adhesive to secure a piece of the same grey van lining carpet that I had used for the rest of the headlining.


Cover for the opening into calorifier space


Bookshelf

The object to the right of the space is the autopilot fluxgate compass, I was thinking of moving it to the space under the shelf but to do that I think it will be necessary to pull the cable all the way back from the autopilot course computer and it has been spiral wrapped so it would be a lot of messing about, unless the cable can be disconnected at the compass but I very much doubt it. Next week I must really make the effort to finish the forward cabin sole and then the heads.


Friday 18 September 2020

Autopilot

The aim this week was to finish tidying the wiring in the aft cabin locker the cabling to the autopilot actuator from the course computer included a chocolate block connector which i wanted to get rid of so I removed the actuator with the intention of renewing all the cables, however the cables to the motor and the clutch were connected directly to these items rather than to a terminal block and as I didn't want to go that far I removed the chocolate block connector and made a soldered connection for the extension cables these connections were wrapped in self amalgamating tape and the whole lot wrapped with spiral wrapping. The problem came when trying to replace the actuator, it is secured with a pin which is retained by a couple of 'R' clips but this is out of sight round the corner so it had to be done by feel, a bit of a struggle. I reconnected the cables and switched the autopilot on to test it and the rudder moved full travel in the opposite direction to that instructed, so after checking that all the cables were correctly connected to the course computer I consulted the manual which covered this very fault the instruction was to swap the two wires for the motor drive over which I did and it now works perfectly. The terminals in the course computer are all colour coded and they had all been correctly connected the only thing that I can think of is that the motor has been changed in the past I don't know but it works.


Autopilot actuator


Cables all wrapped

The job was finished off by wrapping the cables to the 12v/USB outlet in the aft cabin these require securing probably with some sort of self adhesive device. 


Cable to 12v/USB socket

I had hoped that I would be able to venture out into the Swale today and/or yesterday as tides are springs at the moment but unfortunately the weather had other ideas, it was much too windy so I finished up the week by measuring up for next weeks project which is to fit out the space above the locker containing the domestic water system against the saloon aft bulkhead, it requires lining and a shell fitting so that it will make a space possibly for books.


Next weeks project


Friday 11 September 2020

Loose ends

This week I have been tying up a few more loose ends I started on Monday with replacing some sea water hose elbows on the engine, when I put the engine back together I obtained a hose connection kit from Parts 4 Engines basically a bag of short pieces of hose of the various sizes required but the engine has three hose elbows which unfortunately did not come as part of the kit so in order to get the engine running I reused the old ones. Judging from the paint remaining on them these elbows were the originals fitted to the engine when it was manufactured in 1988 and while not in tip top condition they did serve a purpose. In the meantime I had purchased some new silicone hose elbows with the intention of replacing the originals but best laid plans and all that it was not until I was looking round the engine last week that I realised that the original elbows were well past their sell by date, touch them and they left a black stain on the hands, they had perished. The new elbows just required to be cut to size and pushed on and secured with 'Jubilee' clips


Old elbows


New silicone elbows one on right cut to size


New sea water pump elbow


Gearbox cooling elbows

I spent quite a bit of time going through lockers and removing stuff that was no longer required offcuts of wood, all those short bits of cable that one tends to keep as it may be useful one day but never is and boxes that equipment arrived in that you keep in case it is necessary to return it, so things are looking a little tidier now but there is still more to do. I finished off the week by tidying the wiring in the stern locker in the aft cabin it is mostly connected to the auto pilot, it had been temporarily bundled up with cable ties for some time. I started by shortening a couple of over length cables and then bound them together with the spiral wrap.


Cables tidied and wrapped

There is still a bit to do the cables on the right which supply a 12v/usb outlet in the aft cabin need wrapping and the cables from the autopilot course computer to the actuator will probably be replaced with proper tinned cable before being wrapped the cables in the centre of the photograph are the anode bonding cables and there is not very much I can do with them


Friday 4 September 2020

Housekeeping and some sailing

I have decided to leave the sanding of the forward cabin sole for a rainy day the main aim this week was to finish the internal clean and then start externally. I began by cleaning out the wet locker in the heads which was pretty grotty after sanding the sole, the interior is now looking fairly presentable. On Wednesday I went for a brief sail along the Swale as far as Milton Creek this was the first time out since I came out of hospital and so I was using parts of me that I hadn't used for some time. Basically most of my exercise regime has been walking whereas sailing involves a lot of pulling fortunately the weather was benign and the wind direction such that it was one tack out and one back usually with the predominant south westerly one way can involve a lot of tacking. Anyway all went well but I knew that I had done something a bit different. Today the plan was to clean up the exterior she was beginning to get that green colour that comes with external neglect so I set too with the hose and a scrubber, I use a 'Tough Scrub' available from Lakeland it is basically a foam pad with what I think is stainless steel wire anyway they are most effective in removing the muck and that lichen type growth that seems to have an affection for things fibreglass. My apologies for the lack of photographs but we all know what boats that require a good scrub get to look like every boatyard has a few lurking at the back of the yard. That is it for this week I hope to have something a bit more interesting to report next week.

Friday 28 August 2020

Bored with sanding

I started out this week with every intention of finishing the first round of sanding on the forward cabin and heads soles however after a good start I started looking around for something else to do to relieve the monotony for a while. I decided to try and do something with the cockpit sole, it is covered with treadmaster which while being physically in reasonable condition it had a lot of paint, glue, sealant, varnish etc splashes all over some of which I will admit responsibility for others I shall deny all knowledge of. Also it needed a good scrub to remove the dirt and algae. Some time ago number two daughter bought me some 'Drill Brushes' and these proved to be ideal for cleaning between the diamond tread, I used the brush wet with soapy water, and although I used a red grade of brush which is upper mid in terms of stiffness there was no damage to the treadmaster.


The tools

The drill is an old Bosch 9.6v cordless I have had it for about 15 years and like most of these things the batteries gave up the ghost but the actual drill is still going strong so I put a flex on it and use it directly connected to the boat's battery and so far the extra volts have not had any detrimental effect on the drill motor.


Treadmaster after scrubbing

As can be seen the brush did not affect the paint etc as was to be expected but I found that this could be easily removed by rubbing gently with some 60 grit sandpaper.


After removing paint etc

There are some slightly lighter patches where the paint was sanded, they don't show up in the photograph but I am expecting them to darken down to match the rest with wear and exposure to the atmosphere. In an ideal world I would probably replace the treadmaster with fake teak but it is much improved and will suffice for the time being. Next week I will have to get back to the sanding.


Friday 14 August 2020

Sanding

This week has been taken up with sanding the heads and forward cabin soles, it is a bit of a long slow process starting off with 320 grit wet and dry with the aim of working through to 600 grit. It would be a lot quicker to power sand at least for the initial levelling up but the dust gets everywhere and I am not too keen on wet sanding with a mains voltage machine. I have come across a few spots where there are high spots in the layup which will require the further application of flocoat once the preliminary sanding has been completed, the forward cabin being the worst affected I think that this was due to the 450g biaxial cloth being a bit too heavy and the consequent problems with forming it around the bilge access opening.


Forward cabin sole showing high spots in the layup


Heads sole still a way to go

It looks as though the first round of sanding will take most of my time next week.


Friday 7 August 2020

Forward cabin sole

The first task this week was to gelcoat the forward cabin sole this was carried out in the same manner as the heads sole, two coats of gelcoat finished with a coat of flocoat, hopefully to give sufficient thickness to allow for sanding back and final polishing.


Sole after gelcoating

The colour match is not perfect but should be acceptable for the sole it would stick out a bit if used for a repair in the middle of a panel.


Colour match

I hope that when sanded and polished the new gelcoat will blend a little better with the old I am by no means a gelcoat expert so would not attempt a perfect colour match. It is possible tht the original has faded a bit in 45 years and originally  was a bit closer to the new. For the rest of the week I have been sanding the heads sole using various grades of wet and dry paper, this is a bit slow and laborious but makes a lot less mess than power sanding, I have already cleaned up a lot of dust from the original sanding and fairing. Also with power sanding it is all too easy to go through the gelcoat so I will stick with the hand sanding. I have found a couple of areas where the gelcoat was a bit thin and will need some over coating and sanding.


Friday 31 July 2020

Forward cabin

On Monday I added a further layer of glass to the forward cabin sole, to make life easier I made it in sections as the first layer but cut them in such a way that the joints between the sections were overlapped. I spent the rest of the week filling and fairing paying particular attention to the fillets between the sole and the upstand.


Fillets after sanding


Second application just requires sanding

I took a chance and ordered some green beige RAL1000 gelcoat from East Coast Fibreglass Supplies which arrived on Wednesday. The colour chart on the website looked to be a good match to the existing, yes I know on screen colour rendition can't always be relied on but I took a chance. I haven't opened the tin yet to check, that will be a job for Monday. 

Friday 24 July 2020

Gelcoat

The first job this week was to finish sanding the fairing compound on the heads sole, once I was happy with the finish I applied two coats of gelcoat followed by a single coat of flocoat. As the final coat is the same colour as the previous coats the most critical part of the job is making sure that the gelcoat is completely covered otherwise there will be areas where the gelcoat has not cured completely, however when I ran my hand over the sole this morning there were no sticky patches. Hopefully I have applied sufficient to enable me to sand back to leave a smooth finish.


Sole after gelcoat applied

As expected the finish is a bit rough which does not show up in the photograph.

The next job was to lay up three layers of biaxial cloth on the forward cabin sole which had suffered some cracking as well as a section having been cut away to allow the replacement of a section of the bulkhead under the cabin door.


Cracks just visible in corners of bilge access opening


Forward cabin sole

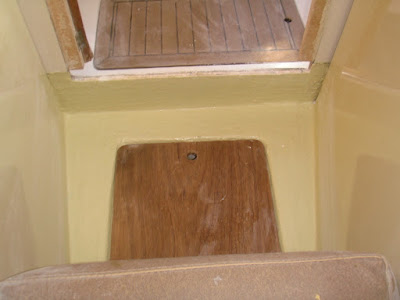
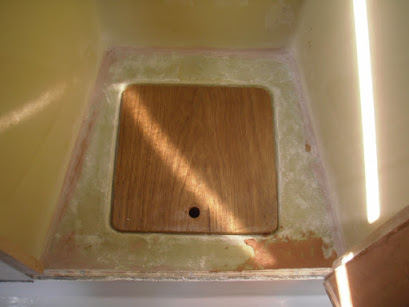
It can be seen that there is quite a gap between the moulding and the bulkhead the port side being much wider than the starboard and there is no evidence of the moulding being tabbed to the bulkhead. When I bought New Morning the sole had very little support especially as the upstand had been cut away which had led to the cracking in the corners of the bilge access opening. Some time ago in order to improve the situation I had screwed and glued a hardwood support to the bulkhead underneath the sole and then reinforced the corners of the opening with a couple of layers of CSM laid up from underneath the moulding, this had stopped any further flexing and damage. The plan now was to lay up three layers of 450g biaxial cloth over the sole and to form an upstand bonded to the bulkhead and then re gelcoat, however I found that 450g was far too heavy, the first layer was fine as it was made up of four sections but the subsequent layers in one piece could not be formed around the double bends of the bilge access opening, I had a similar problem with the heads sole, see last weeks post, but as the forward cabin sole is much smaller it was therefore much more difficult so in the end I called it a day with just the one layer, I shall have a rethink on Monday.


Forward cabin sole with one layer of biaxial cloth


Friday 17 July 2020

Filling and fairing

This will be a short post this week I was hoping to get as far as getting the gelcoat on the heads sole but I ran out of time. I did however spend some time measuring up the surplus biaxial cloth that I had left over and with a bit of fiddling about there will be just enough to put three layers on the forward cabin sole if the first layer is made up of offcuts, but that is going to be the next job. Back to the job in hand I started by mixing polyester resin with micro balloons to produce some fairing compound, this was applied to any obvious low spots particularly on the repaired upstand and also to form a fillet all around the existing upstand. Once it had cured I started sanding it all level which was a bit time consuming also extremely messy the dust gets everywhere. It is now mostly complete just a little more sanding on the fillets which I have to do by hand, and there a few small areas which require a further application of fairing compound.


After sanding

I finished up the week by having a bit of a clean up once the job is complete I will have to have a good clean right through. The sole is now noticeably stiffer it still flexes a little bit at the left hand end of the opening but this is the area with the largest overhang and with the large opening I guess it would probably need at least three more layers of glass to make it totally rigid but I am satisfied with it as it is at least the sole does not creak and groan when you walk on it now. 

Friday 10 July 2020

Still on fibreglass

The materials for the heads sole arrived last Friday, usual good service from East Coast Fibreglass Supplies, so this week I was able to crack on with stiffening up the sole. I started by giving the existing sole a good sanding with a random orbital sander and some 50 grit discs followed by a good clean up. once this was complete I cut out the three layers of 450g biaxial glass cloth so that everything was ready for me to start straight away on the job on Wednesday morning. I started on Wednesday morning by cleaning down with acetone before laying up the three layers of glass cloth on the sole and then left it to cure.


After glassing over the sole

The first task today was to trim round the bilge access opening with an oscillating multi tool, I have a Bosch cordless and is one of the most useful power tools that I have should have bought one years ago.


After trimming the opening

I had some problems getting the biaxial cloth to form itself into the access opening as there is a tight double bend which forms the recess for the access cover as well as the corners of the opening and on inspection it would appear that the top lamination had lifted leaving a void along the right hand end of the opening, unfortunately it does not show up in the photograph. I think maybe that 450g cloth was a bit on the heavy side and that I would have been better going for perhaps four layers of 300g cloth however the rest seemed to be OK. To rectify the situation I cut off the bubble, which was only one layer, with the multi tool, before building up the recess with a strip of biaxial cloth and some more resin. The whole area will require a good sanding and some fairing compound before gelcoating, as a job like this is basically working in reverse, the normal method of fibreglass construction is to start out with a polished mould into which goes the gelcoat followed by the fibreglass. Trying to lay fibreglass that is level enough to take the gelcoat is a lot more difficult especially as I am not an expert. Next week the aim is to get the sanding and fairing done and the gelcoat applied the plan is to use two coats of gelcoat with a coat of flocoat over it topreclude the air and allow it all to cure.


Friday 3 July 2020

Back to fibreglass

After some thought I have decided to bring the heads sole repair level with the remainder of the upstand and then to stiffen up the sole, which is a little bit on the bendy side, with two or three layers of 450g biaxial cloth and resin then gelcoat over the whole lot on completion. I  started this week by laying up more CSM on the repair until I ran out of resin, once the resin had cured I sanded out the high spots leaving some low areas which are shallow enough that I can fill them with fairing compound made up with polyester resin and glass beads. The materials for the completion of the job arrived today so that I should be able to press on with this task next week.


After sanding the repair

The gelcoat on the sole is not in good condition there is some cracking which I think is more than likely down to impact damage it is also discoloured and even after sanding does not look very good so re gelcoating is going to be the best option. This has been a bit of a short post as a lot of time was taken cleaning up after sanding the new fibreglass although my orbital sander has a dust collection bag it still seems to spread dust everywhere, probably a better bet would be a connection to a vacuum cleaner.

Also this week I have been experimenting with wood dye in an attempt to match the merenti, that I am using for the door frames, with the remainder of the internal trim, that which I used for the cabinet door trim did not turn out to be a particularly good match so this time I have tried Colron deep mahogany which after several coats of varnish has turned out to be a much better match.


Test piece against the compression post trim

The odd patches are a result of the reflection of the camera flash in the varnish


Friday 26 June 2020

Wood and varnish again

I haven't done a great deal this week the aim was to finish varnishing the last of the wood trim and fixing it in place. I started in the aft cabin with pieces to cover the forward and aft end of the locker panels on both sides, the photographs show the port side.


Aft cabin forward end 


Aft end

I then moved on to the long lengths either side of the mast compression post in the saloon, the piece on the starboard side was an exact fit between the clock mount and the compression post which makes picking up the keyhole plate mountings for the clock much easier, this was purely accidental.


Trim either side of compression post


The next move was to finish the trim round the heads internal moulding there is a cover strip over the join between the locker moulding and the sole moulding under the doors. the vertical trim to the left hand side of the doors and finally the trim at each end of the worktop, this part is now pretty much complete.


Heads moulding

The last two pieces were above the windows in the forward cabin they help support the head lining and also originally provide something for the curtain track to be secured to.


I have now used up all of the original hardwood that came with the boat most of it has not been put back in its original position, but I have tried to make the best use of it without too many offcuts. Reuse, recycling or upcycling whatever you want to call it has entailed plugging some of the original screw holes which I think adds to the history well that is what I will claim anyway.