Wednesday, 8 February 2017

Further progress on the galley

A bit of a rise in temperature last week enabled me to get a couple of coats of paint in the lockers behind the cooker and the backs of the front panels. Once it was dry I decided that bit would be a good idea to reseal both of the port side chain plates before assembling the lockers which once done would make them a bit more awkward to get at, no photographs I am afraid but it was all simple straightforward stuff, remove the deck plates. remove the bolts securing the chain plates to the bulkheads, clean up, generously anoint with Sikaflex then replace the bolts and tighten down the deck plates until the Sikaflex was nicely squeezed out all round then leave to cure. Once cured give the deck plates a final tighten up.

Today I assembled the doors into the front panels and fitted them in place eventually the locker fronts will be finished with varnished timber trim to match the panel above the chart table, see photograph in the post of 20/01/2017, but that will have to wait for some warmer weather its much too cold for varnishing at the moment.


Locker front panels

I have also installed the concealed light fitting above the front panel and connected to the bus bar within the locker.


Concealed LED strip light

Over the weekend I cut out the tee shaped slots in the front of the lower crockery stowage locker I hope that I can now find crockery that will fit. I am still thinking about the interior of the locker as it will require a means of restraining the crockery from sliding about, the thought at the moment is to have some vertical dowels secured into a board to suit the diameter of the plates etc.


Crockery stowage

As can be seen this locker still requires painting once the weather becomes a bit more conducive to the task, the upper section and the shelf is in hand. Also as can be seen the top of the GRP galley moulding is anything but flat so it looks as though I will have to fit some bracing underneath to try and straighten it up before fitting the worktop which should arrive on Monday B&Q permitting.

I have also made a start on the front panel for the locker behind the washbasin in the heads this has been recycled from the forward cabin locker front panel which the previous owner had fabricated unfortunately it had succumbed to the rainwater which had been leaking in through the holes for the deck fittings when I removed it to bolt up the toe rail I found that the bottom four inches or so of the plywood had rotted away. Fortunately all was not lost in fact I also recovered some of the laminate which once it had been cleaned up and the old adhesive removed was used for the locker front panels behind the cooker. As can be seen the openings for the doors still need to be enlarged the round holes are for the corners and indicate the extent of the openings and also the timber to take the door runners needs to be fitted. 


Heads locker

Further progress in this area is again going to depend on an improvement in the weather to allow the painting to be carried out.


Monday, 30 January 2017

Galley again

Work on the galley has been held up by the cold spell last week I have made the front panels for the lockers behind the cooker but it has not been possible to paint the inside of the locker or the the reverse side of the front panels which I need to do before I can attach the sliding doors. In the meantime I have started on the locker at the forward end of the galley this will have tee shaped openings for the crockery stowage I have made the lower front panel, which now needs the openings cutting out, and started on the upper front panel.


Lower locker


Lower crockery stowage

Whilst waiting for the weather to warm up I began installing the wiring for the concealed LED strip lights each of these luminaires has two negative connections one for white light and one for red night vision lighting control will be by means of an on/off/on three position switch and as there will be six of these luminaires in total I required a means of connecting all the negatives in a tidy fashion with only two negative cables arriving at the control switch . After much searching I found a 3 x 6 spade connection bus bar on the Fearneaux Riddall website which will meet the requirements without breaking the bank. The plan is to put one on each side of the saloon so that the lighting on each side can be switched on and off independently these will in turn be connected to a third unit so that only two negative cables  are connected to the night vision/white lighting mode control the supplies to the lighting in the heads will also be taken from this system as they will have the same white/night vision lighting arrangement. The starboard bus bar will be installed when I have decided on the locker arrangements on that side of the saloon. A 2 x 6 spade connection bus bar is also available which I will probably use for distribution to the over bunk reading lights in the fore and aft cabins. Whilst working on the wiring I also connected the supplies for the VHF and the chart plotter, I am beginning to think about batteries so that I can test some of this kit.


Port side bus bar


Main lighting bus bar

I had a delivery from B&Q last Thursday of some of the solid laminate worktop material but unfortunately the piece for the galley was out of stock no prior warning I only found out after calling them to complain that half the order was missing I have bought all sorts of stuff for this project from the internet with very little trouble mostly from smaller firms who have all told me at the time of order if stuff was unavailable but it seems the big companies are a different story it will be another two weeks before the rest of the material turns up they did try for three weeks but after some discussion it was two weeks.

Over the weekend I cut out the worktop for the heads washbasin and there was sufficient material left for the small area in the aft cabin which I cut out I have just laid these pieces in place for the time being, as I have not yet got the washbasin, at least it covers the hole in the heads moulding.


Heads washbasin position


Worktop in place


Aft cabin

Finally today with a rise in temperature I managed to get a coat of paint in the locker behind the cooker and on the backs of the locker front panels no photograph I am afraid as by the time I had finished it was time to pack up and go home. 

Friday, 20 January 2017

More galley

I went to the boat show last week and bought a new chart plotter and DSC radio the. show was not as big as it used to be only utilising one hall and nothing afloat in the adjacent dock but as I had a free ticket and the deal from Cactus for the electronics covered the train fair and I saw pretty much everything that I wanted to see I have no complaints.

So back to work on the galley this week with further work on the locker behind the cooker, this will be on two levels I had already made the plywood panel for the front of the upper level this has now been covered with laminate and the opening cut out. I have decided to use some of the white laminate to make the sliding doors  as I have a lot of off cuts left this stuff is 4mm thick so should be OK and it will save a few quid on the price of the acrylic sheet. The upper doors are now made and I have sourced some twin channel plastic for the tracks. I need to paint the back of the locker front and the interior of the locker before I can go any further in this area but the current cold spell has put a stop to that for the time being.


Upper locker front and doors

In the meantime I have made the locker front for the lower level just needs the opening cut out and the doors making which will be a homework job for this weekend.


Locker lower level front panel

I have finally sourced some solid laminate 12.5mm thick for the work tops without having to buy huge amounts that I really don't need found it at B&Q still a bit pricey though but there will be enough to do the heads basin worktop and the little bit in the aft cabin I am just waiting for it to arrive.

Today I decided to rearrange the panel above the chart table originally I was going to install the NASA GPS repeater and connect it to the chart plotter in the cockpit which would give a position read out at the chart table however I had bought a Brooks and Gatehouse Vulcan 7 plotter which only supports NMEA 2000 as opposed to the repeater which operates on NMEA 0183 I know there are converters available but as the VHF has a built in GPS this will give a position read out at the chart table and also provide a back up to the chart plotter. I had to take the panel apart to install the concealed strip light and after I had put it all back together again assuming that I would be able to access the rear of the panel to install the VHF I found that it was extremely awkward to attach the VHF securing brackets so I had to take the whole lot out again but as can be seen its all done now.


VHF radio installed


LED strip light

The three way switch panel will be used for the  power supplies to the navigational instruments.

For the time being the navigational instruments will operate on a stand alone basis  the auto pilot uses Raymarine Seatalk data and even this comes in two formats my autopilot uses the older format and I don't know whether or not this can be adapted to operate with the B&G plotter further investigation is required. The existing wind instruments are not capable of any data output at all and I won't even know if they are going to work until the mast goes up but not having them all linked is not going to stop the world from spinning round.


Friday, 6 January 2017

Galley

Starting back after the Christmas break I decided to make a start on the galley as I intend the saloon lighting to be concealed led strips behind the timber rail which runs under the windows on both sides also it will be nice to get the cooker up and running. The photographs below show the galley area as it was when I purchased New Morning with the exception of the new shelf in the centre photograph. The plan is to continue the same theme as the panel above the chart table for the locker fronts they will be covered in the same off white laminate with the varnished teak trim the doors will in all probability be acrylic sheet sliding. I have been giving the worktop some careful consideration, previously I believe it had been finished with ceramic tiles which I am not too keen on, the top of the galley moulding is a bit on the flexible side at the moment so the new worktop will need to be reasonably rigid my first choice would be to go for 'Corian' but it is expensive and small quantities seem to be difficult to obtain the second choice is 'Compact' laminate which can be obtained in 10mm thick sheets but again this seems to be available in three or four metre long sheets only which even if I use the same pattern for the heads worktop is far too much for what I want to do and although this stuff is probably cheaper than 'Corian' it will still make a relatively expensive job and I will be left with a substantial off cut which I unlikely to have a use for. I came across this video on Youtube of a guy in Denmark who seems to be able to get hold of small amounts https://youtu.be/tKPAVfjqVNE however I shall continue the search.


Today I trial fitted the first of the locker fronts over the weekend I shall glue on the laminate and cut out the opening for the doors.


Locker front trial fitting

Found this in Aldi yesterday ceramic disc mixer tap for £29.99 made in China of course but should be OK for the galley sink.


I also have in hand now the led strip lights these can either be white or red to help preserve night vision at sea there are two negative leads one for white and one for red light they just require a three position, on/off/on, changeover switch in the negative wires I have sufficient to install two in the heads as well as the saloon. These luminaires are at 520mm long are too long to fit over the forward locker and the only shorter fittings that I can find do not have the red light facility but the four should be OK at night.


The longer screws for the headlining timber trim arrived today so that can be wrapped up in the near future. I shall be off to the London International Boat Show next week, time to start thinking about a chart plotter and DSC VHF radio, so for that and several other reasons it will be a bit of a short working week.


Friday, 23 December 2016

More head lining 3

The next phase of the head lining project is to finish off in the aft cabin I had already covered the sides of the coach roof and the under deck panels just leaving the roof to do. The first job was to cut out and stick the laminate panels on the inside of the forward bulkhead these were roughly shaped using a cardboard pattern and then finally trimmed and fitted in place with Evostick contact adhesive it can be a bit messy spreading the stuff on vertical surfaces the panel itself was easy just a matter of laying it flat pouring the stuff on and spreading it out.


Fitting the ply panel

The ply panel was roughed out using the cardboard pattern before being trimmed and fitted again using timber to hold it up. Once the panel fitted in a satisfactory manner it was taken home to have the lining carpet glued on.


Reverse side of panel with carpet glued on

The above photograph shows the reverse side before the edge had been folded back and glued down. Over the weekend I had sanded and varnished the timber trim ready to be installed.


Roof panel in place

I have put some of the timber trim in place but unfortunately I am short of the correct length screws as the carpet is thicker than the original vinyl lining I need longer screws these are raised head countersunk self tappers which I have ordered but I expect that they are strike bound in a post office somewhere these will also be needed to complete the saloon timber trim. That is just about it for the head lining only the quarter berth left to do. The original locker front panels for the aft cabin are in pretty poor shape the glued on veneer is peeling off in places but the previous owner had cut out some new ply panels for this purpose which I have more or less decided to use instead of refurbishing the old ones the thought at the moment is to cover them with some more of the van lining carpet probably in a darker shade than the head lining watch this space. 


Friday, 9 December 2016

More head lining 2

The head lining is progressing at a satisfying rate I have now more or less finished the saloon it just needs the timber trim pieces sanding and varnishing I have identified most of them so that task will be this weekends homework project. The method has been the same as for the fore cabin so I will not bore you with another description but will show the photographs.


Fitting the forward panel in the saloon


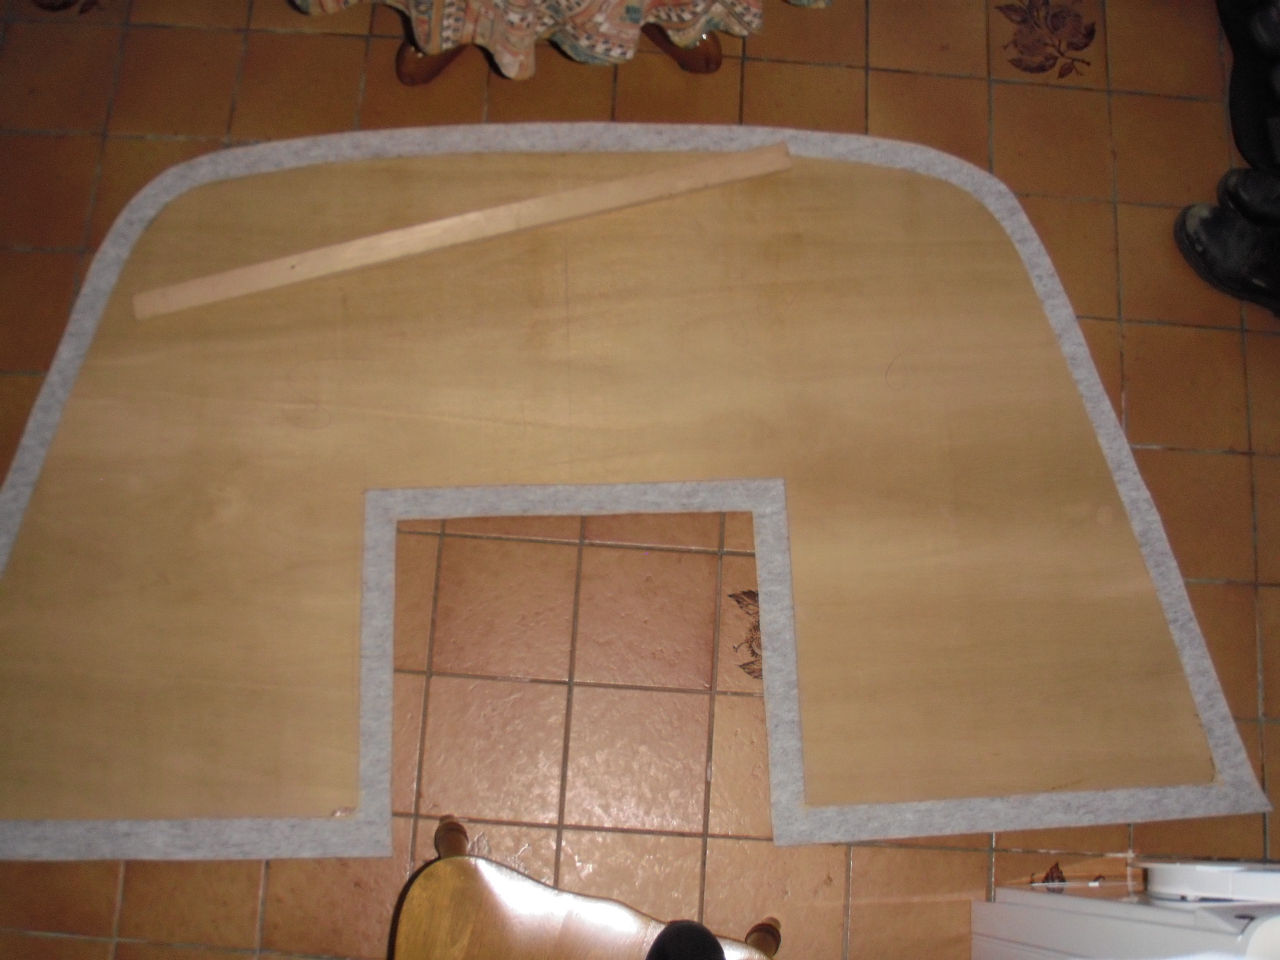
Trial fitting of the aft ply panel

The round piece of ply to the left of the photograph is a temporary support for the forward panel. Because of the shape of the saloon, a lot wider than it is long its a bit difficult to get a good photograph of the whole head lining.


Fitting the aft panel

As with the forward panel it was necessary to use timber props to support the panel the aft panel is much more floppy than the forward one due to the cut out for the companion way. The join between the two panels is a bit more obvious in reality as the two panels naturally bend by different amounts once I have all the timber trim in place, which also supports the panels, I will possibly make a cover strip to go over the join. The the panels are secured to the timber roof stiffeners, which are glassed into the structure, with stainless steel cups and screws.


Monday, 5 December 2016