Friday, 16 March 2018

Fibreglass weather

It was good weather for fibreglass this week but the first job on Monday morning was to get the second coat of primer undercoat on the chain locker bulkhead and another coat on the stern gland access cover. Once that was out of the way I went round and sanded the various areas around the keel that required filling after which I wiped down with acetone before filling with epoxy thickened with colloidal silica mixed to the usual peanut butter consistency.

I had several nominally empty epoxy resin and hardener tins kicking around each with some of the contents remaining I find that the West System dispensing pumps seem to lose suction leaving an appreciable amount in the bottom of the tin so I spent some time punching a hole in the bottom of each tin and fully draining the remaining contents into the tins that I am using at present given the price of the stuff these days it was a worthwhile operation, also I stripped the pumps and gave them a thorough clean out in hot soapy water something I should have done some time ago as particularly in the resin pump  there was a fair amount of congealed resin present which after a good soak had dissolved.

While the weather was being kind I started on the repairs to the heads locker moulding a section had been cut from the lower locker opening for what reason I am unsure but I do know from bitter experience that this had left two nasty corners which could be quite painful. I decided to fill in the cut out section with some 50mm x 5mm GRP flat bar in much the same way as I had previously done for the galley locker. After giving the inside a good sanding and a wipe down with acetone I clamped a flat piece of timber covered with polythene,so that it would not stick to the epoxy. across the cut out and then clamped a piece of the GRP bar to the timber so that it would be as flush as possible with the original moulding I then cut four pieces of woven glass cloth and epoxied them into place to hold the bar.


First fix of GRP bar

Once the epoxy was cured I removed all the clamps then gave it all a  clean down with water to remove any amine blush followed by a sanding and a wipe down with acetone before fully glassing the full length of the infill with several layers of woven glass cloth.


The infill fully glassed in

As can be seen there is a bit of a gap at one end of the infill which requires to be filled also a number of redundant holes but I had run out of colloidal silica by this time a trip to the chandlers will be required before I can complete this item. Once it has been filled and faired the plan is to gelcoat the whole area as previously carried out with the galley locker.

There are a number of construction details on this boat with which I am less than impressed one of these is the hull/deck joint the deck is pop riveted to a flange moulded round the top of the hull and the whole joint has then been glassed over from underneath. I have repaired several leaks in this joint by cleaning back and re glassing short sections however there have been a couple of leaks at the bulkheads and by cutting back the tabbing at the top of the offending bulkheads I find that the bulkheads had obviously been fitted before the hull deck joint had been made and the GRP seal had been terminated at each bulkhead such that any water entering the hull deck joint can travel along to the top of the bulkhead which is not sealed fortunately there does not seem to be any serious damage caused so far. After cutting back the tabbing in the affected areas I have sealed off the hull deck joint covering with thickened epoxy and I am now waiting for some wet weather to test the repair if it is successful the plan is to reinstate the tabbing this will be a dry boat.

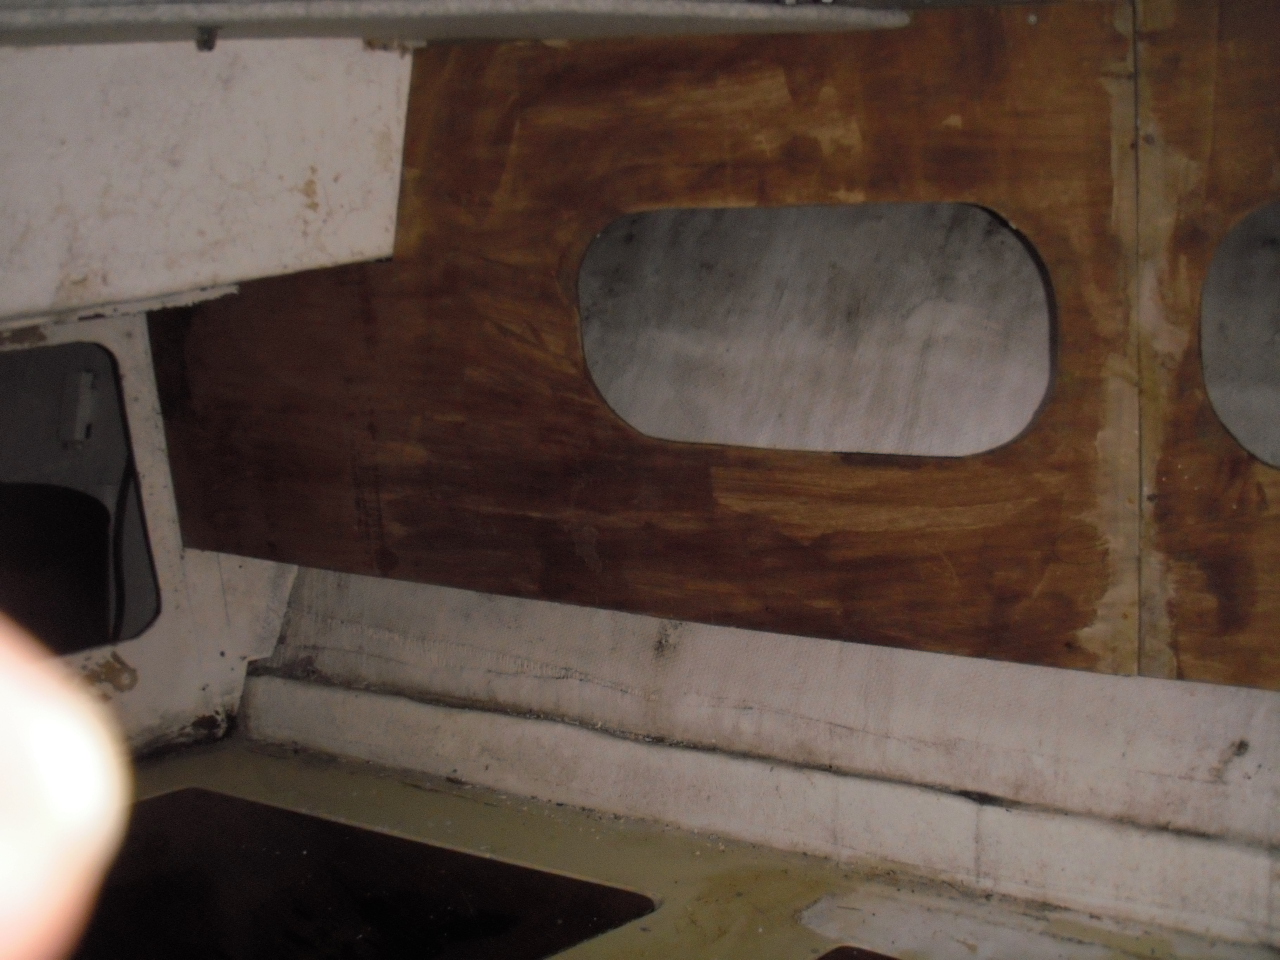
To finish up the week I have completed the painting of the chain locker bulkhead and the stern gland access cover. On the homework front the painting of the forward cabin locker panels is now complete I intend to let the paint fully harden before bringing them back to the boat next week. The homework for the coming weekend/week is to sand and paint the heads wet locker front panel although the weekend is threatening to be too cold for painting.


Chain locker bulkhead

There is still some work to be done up here before the locker panels can be fitted re the cable openings to the pulpit for the navigation lights, the deck openings do not line up with the pulpit bases I did install draw wires when I fitted the pulpit but as the holes don't line up they appear to be trapped. Weather  permitting I will try and rectify this next week.


Friday, 9 March 2018

The weather improves

Now that all the nasty white stuff has gone and the temperature has risen sufficiently it was time to get on with preparations for anti fouling but before that I spent most of Monday morning draining the bilges the ingress of water was a bit of a puzzle at first but I finally twigged that when I altered the gas locker drain so that it discharged directly overboard I had neglected to blank off the old skin fitting which allowed the gas locker to drain into the cockpit. This skin fitting is just above the level of the cockpit drains and was connected to the gas locker by means of a hose which ran through the void space around the gas locker, see an earlier post. There had been quite a considerable amount of snow in the cockpit and when it started to thaw the cockpit drains were probably still blocked with frozen snow so the water ran into the void space through the open skin fitting and then through into the saloon bilge but all was not lost as it gave me the opportunity to test the refurbished saloon bilge pump. In the near future I will remove the guilty skin fitting and glass over the opening.

Once the rain had stopped it was time to put on the protective stuff, dust mask, goggles, boiler suit etc and start on the old anti fouling quite a lot had been removed by the previous owner but there was still a fair bit of flaking stuff I therefore gave the whole underwater area a good going over with the tungsten carbide scraper anything which survived this will be allowed to remain. I spent most of Wednesday and this morning on the job finally finishing about lunchtime by giving the whole underwater area a good wash down with a stainless steel scrubbing pad. The previous owner had stripped the cast iron keel which will need a coat of rust treatment and primer before the anti fouling is applied.


After scraping the old anti fouling

After lunch the rain returned which brought a halt to further outside work there is still a bit of fairing to do on the underwater area particularly at the hull keel joint I think that originally the keel flange was a little proud of the hull and fairing filler had been applied some of which requires making good in places the weather forecast is looking reasonably favourable for next week for epoxy work.

As it was raining I finished up the day by filling the redundant screw holes in the cable locker bulkhead before sanding and priming the bare plywood I also managed another coat of paint to the cover for the stern gland access in the aft cabin.

Over last weekend and this week I managed two coats of primer/undercoat on the locker panels for the forward cabin the plan is to get two coats of gloss white on both sides over the weekend and the coming week. Painting both sides of these items takes up quite a bit of time.


I have added the photograph of the cables through the starboard side of the saloon after spiral wrapping which I had omitted previously, they will eventually be concealed above headlining panels.


Friday, 2 March 2018

Inclement weather

I didn't manage to achieve a great deal this week due to the freezing weather I managed to get down to the boatyard on Monday and sanded the anchor locker bulkhead ready for painting then finished wrapping the cables on the starboard side of the saloon see the photograph from last weeks post unfortunately I had left the camera at home so apologies for lack of photographs.

When I did the engine test run I did not put antifreeze in the water jacket in case there were any leaks and the antifreeze would have ended up in the bilge I did drain the water out again so that I could refurbish a couple of the engine drain cocks however I did omit to drain the water jacket to the gearbox and as I had used fresh water through the raw water circuit for the test run I had to make this a priority job in view of the forecast freezing weather, there was a sigh of relief when I removed the drain plug and water ran out.

While down at the yard I did a trial fit of the propeller as I wanted to ascertain whether of not there was room for a rope cutter between the propeller and the 'P' bracket in the event there was only 10mm and I am going to need approximately 25mm depending on the type of rope cutter, the only practical way to achieve this will be to fit a spacer in the engine coupling, the other option would be a longer propeller shaft which would be a much more costly option also removing the existing shaft would entail lifting the engine, it may be possible to remove the coupling and the cutlass bearing and wriggle the shaft past the skeg but that is a bit of an unknown. I haven't decided on the type of rope cutter but am leaning towards either the R&D knife type http://www.randdmarine.co.uk/downloads/RandD_RopeCutter.pdf or the Shaft Knife Plus from T Norris http://www.tnorrismarine.co.uk/shaft-knife-plus/ the R&D has a recess which overlaps the aft end of the 'P' bracket which should avoid rope etc being jammed between moving and stationary parts, the Shaft Knife Plus is a bit more of a saw than a knife.

I did manage to get the locker front panels for the forward cabin cleaned up and sanded ready for painting last weekend at home, I used the tungsten carbide scraper to remove the majority of the old adhesive before filling the ho;es and sanding, I think that they have cleaned up rather well.


Before and after

I have just noticed that I hadn't sanded the right hand panel after filling various holes when I took the photograph although it has been done now. Hopefully the weather will allow me to get these items painted next week also the aim is, weather permitting to finish the topsides and the fairing of the underwater areas there is now a glimmer of light beginning to show at the end of the project.

Friday, 23 February 2018

Head lining

With the inclement weather again this week I have been making further progress with the head lining the first job was to complete the plywood panels I had enough contact adhesive to finish the panel for the aft cabin behind the companionway originally there was no lining panel in the centre as there was an enclosure for the original exhaust water lock the reasons for the replacement of which I have already covered in a previous post. I find that various brokerage sites are useful for photographs of the original fit out a particularly useful one has been an outfit called Yachtgrot which has a video of a Moody 33 mk1 for sale on Youtube this gives a good scan of the interior of the boat either go to Youtube and search Moody 33 it will come up on a list of videos or use this link https://youtu.be/MeNEjU_EjTg.


Headlining under the companionway

The two stainless steel rings are lashing points for the berth lee cloths I spent some time cleaning up the original lee cloths these are PVC type material they still have some rust stains on them which I will attempt to remove with oxallic acid. It was at this point that I had used the last of my stock of spray contact adhesive I had ordered further supplies from Harrisons Trim Supplies on Monday evening dispatched on Tuesday and delivered on Wednesday which is pretty good service.

I spent today covering the panels that fit under the side decks in the forward cabin and then fitting them in place


Starboard side


Port side

This weekends homework is make a start on the cleaning up and painting the locker panels for the forward cabin I brought two of them home with me as I don't think that I will get very far as it will probably be far too cold for painting but if the weather is fine I may be able to get outside and start on removing the old contact adhesive. 

I managed to glue the lining carpet to the port side lockers in the aft cabin and also cut to size the lining carpet for the starboard side of the saloon which will be a job for next week I still have to clean down all the old loose paint and or old adhesive.


Lining on port side aft cabin


Starboard side saloon

You will note the hanging cables the intention is to wrap them with spiral wrap to tidy things up they will then be concealed above head lining panels under the side deck I finished up the day by making a start on wrapping these cables its a bit of a slow laborious job as the spiral wrap comes in 25 metre lengths and it gets tangled and also needs untwisting at regular intervals as the spiral tends to tighten up during the wrapping process I am reluctant to cut it as it is a bit difficult to judge the amount required particularly if the bundle of cables is larger or smaller than the spiral wrap as received usually one is left with it too short or with lots of short offcuts which have no practical use. 


Friday, 16 February 2018

Various bits and pieces

I started this week by completing the clean up of the forward cabin internal moulding once this was done I started on the saloon internal moulding this was not as bad as the forward cabin but after a good going over with some fine wet and dry it looks a lot more presentable.


Saloon moulding after clean up

There are still some outstanding areas of headlining to complete mainly in the forward cabin under the side decks and now that the locker front panels have been temporarily installed I made a start on producing the ply panels using up various offcuts of 4mm ply I have also made a panel for the port side of the heads under the side deck and panels for the starboard side of the saloon under the side deck. The only outstanding panels are for the aft cabin under the companionway and the main panels for the heads. The aim is to make as much as possible from the offcuts that I have I will have to obtain a sheet of ply for the two panels in the heads but it looks as though I have enough for the rest I shall do the same with the lining carpet before deciding how much more I need to order.


Various bits of headlining panels

I also finished the engine hatch covers by fitting the latches which had arrived last week unfortunately I had run out of small stainless wood screws these arrived yesterday it seems that the local DIY establishments do not see a need to stock this sort of thing I like to use raised head countersunk screws which I obtain from a firm called Precision Technology Supplies the only problem is there is a minimum order of 200 but at £4.98 plus VAT I can live with that I am bound to need some more in the future, they also previously supplied some raised head countersunk self tappers for fixing the headlining very prompt service ordered Tuesday evening dispatched first class post Wednesday arrived yesterday. 


Engine access panels all complete

Just to finish off the week no2 daughter had been doing her bit with the engraved panels again this time an aid memoir with SSR number, MMSI number and the vessel's call sign mounted adjacent to the VHF could be very useful in a panic when things are going pear shaped, especially at my age, or if someone who is not totally familiar with the boat is left to call for help.


New aid memoir


Friday, 9 February 2018

Moving forward

I started in the aft cabin again this week fitting the cleats for the starboard forward locker front panel which is now in place temporarily.


Starboard forward panel in place

Over the weekend I made some stainless steel corner pieces to hold the top of the engine space access covers in place the job will be completed by fitting latches on the bottom edge of the covers these have arrived today, I hope, from ASAP Supplies I will find out later when I open the box.


Access panels with stainless corner pieces

That is about all I can do in the aft cabin for the moment I need spray adhesive for the lining carpet and plywood for the shelves in the lockers so I have moved on to the forward cabin on Wednesday I fitted the locker front panels in place so that I could measure for the plywood for the base of the lockers I will also require some more lining carpet and spray adhesive, the locker front panels require a good clean up to remove the old adhesive and the plan is to paint them white in a similar manner to the aft cabin.


Forward cabin locker panels

The companionway steps in the aft cabin and the saloon are made up of stainless rails with wooden treads bolted on the rails are bolted through the cockpit bulkheads at the top of both sets of steps these bolts have been sealed to prevent water ingress so when I wanted to get the locker front panels into the aft cabin and the batteries into the battery locker in the saloon I had to remove one of the treads rather than taking out the whole ladder with the subsequent resealing of the bolts at the top. The bolts securing the treads were an odd mixture of stainless machine screws with brass nuts and some were difficult to remove so I had the idea of replacing all the bolts securing the treads with stainless bolts with stainless wingnuts to make the job easier in the future this will also make access to the after end of the engine space much easier as can be seen from the photograph above. After collecting the required bolts and wingnuts from the chandlers yesterday I set about replacing all the nuts and bolts securing the treads as the first job this morning.


Wingnuts securing treads

For the rest of today I set about cleaning up the top of the internal moulding in the forward cabin removing all the over painting, adhesive splashes and other staining.


Inner moulding before clean up


After clean up on starboard side

There is still a bit more work to do on the port side which will be the first job next week, but before the forward cabin can be completed I need to finish the wiring to the navigation lights on the pulpit I left some draw wires through the pulpit when I fitted it but unfortunately they seem to be jammed  which will mean unbolting the aft feet of the pulpit and possibly modifying the cable opening through the deck so that it lines up with the opening in the pulpit foot a bit better, but that will have to wait until the weather gets a bit warmer.


Friday, 2 February 2018

Further work in the aft cabin

No post last week as I had a week off suffering with a cold or could it have been man flue so very little was achieved although I did manage to paint the two doors for the openings in the aft engine space bulkhead.

I started this week by fitting a frame round the stern gland access opening in the aft cabin sole, in a similar manner to the engine access openings with the idea of stopping the cover going walkabout when the boat heels once this was complete I gave all the frames a couple of coats of grey paint before cutting out and painting the cover for the stern gland access opening. While cutting out ply I used a hole saw to make a blank to fill the round hole in the bulkhead above the engine seacock access I will glue this in place with some thickened epoxy once the weather has warmed up sufficiently.


All the openings can now be closed up

To complete the job I just need to obtain and fit some catches to hold the the access doors in place I have some thoughts for this just need to pick up the bits.

I finished up the week by cutting and fitting the cleats so that I can secure the forward front panel and fit the shelf in the port side lockers which is about all I can do on this side at the moment until I obtain some more adhesive for the lining carpet. I did spend some time cleaning up the cabin sole forward of the companionway I removed all the paint and glue splashes and gave it a bit of a sanding, the moulding does have a number of scratches in this area which I intend to have another go at sanding out if possible, they don't show up in the above photograph.


Port side forward locker panel in place