Friday, 4 May 2018

Time to start thinking about splashing

For a number of reasons I have decided that the next priority is to get New Morning in the water as soon as possible mainly because I have been working on the restoration for over two years and it is time to go sailing again there will still be some work to be done but this was always part of the plan there is always work to be done on boats especially old ones, the other main reason is that the future of the present location is far from sure due to the local redevelopment plans so to have the boat in the water so that it can be moved easily will be a distinct advantage. To this end I had originally planned to get on with the remaining underwater work this week beginning with fitting the propeller on Monday but the weather gods had other plans and Monday dawned cold, wet and miserable so plan 'B' was to finish the trim pieces for the heads bulkheads the forward piece was finished and fitted and a start on producing the aft piece was made this was to form a cable duct for the mast cables by laminating two narrower pieces to the front.


Forward trim

Tuesday dawned warm and bright so the first job was to get the propeller fitted I started by checking the fit of the taper with engineers marking blue which indicated a satisfactory match between the tapers on the shaft and the prop. I assume that the propeller has been re bored at sometime as the boss goes way beyond the end of the shaft taper such that it needs a couple of spacing washers to allow the nut to be fully tightened, I don't consider this to be good engineering practise but it will have to do for the time being. The next move was to fit the new shaft key which I had made over the weekend this required removal of some material from the top face to ensure that the top of the propeller key way would be clear of the top of the key when the nut was pulled up then once the nut was tightened down it was split pinned job done.


Propeller fitted

Once the propeller was completed I finished off making the bits for the aft bulkhead trim.

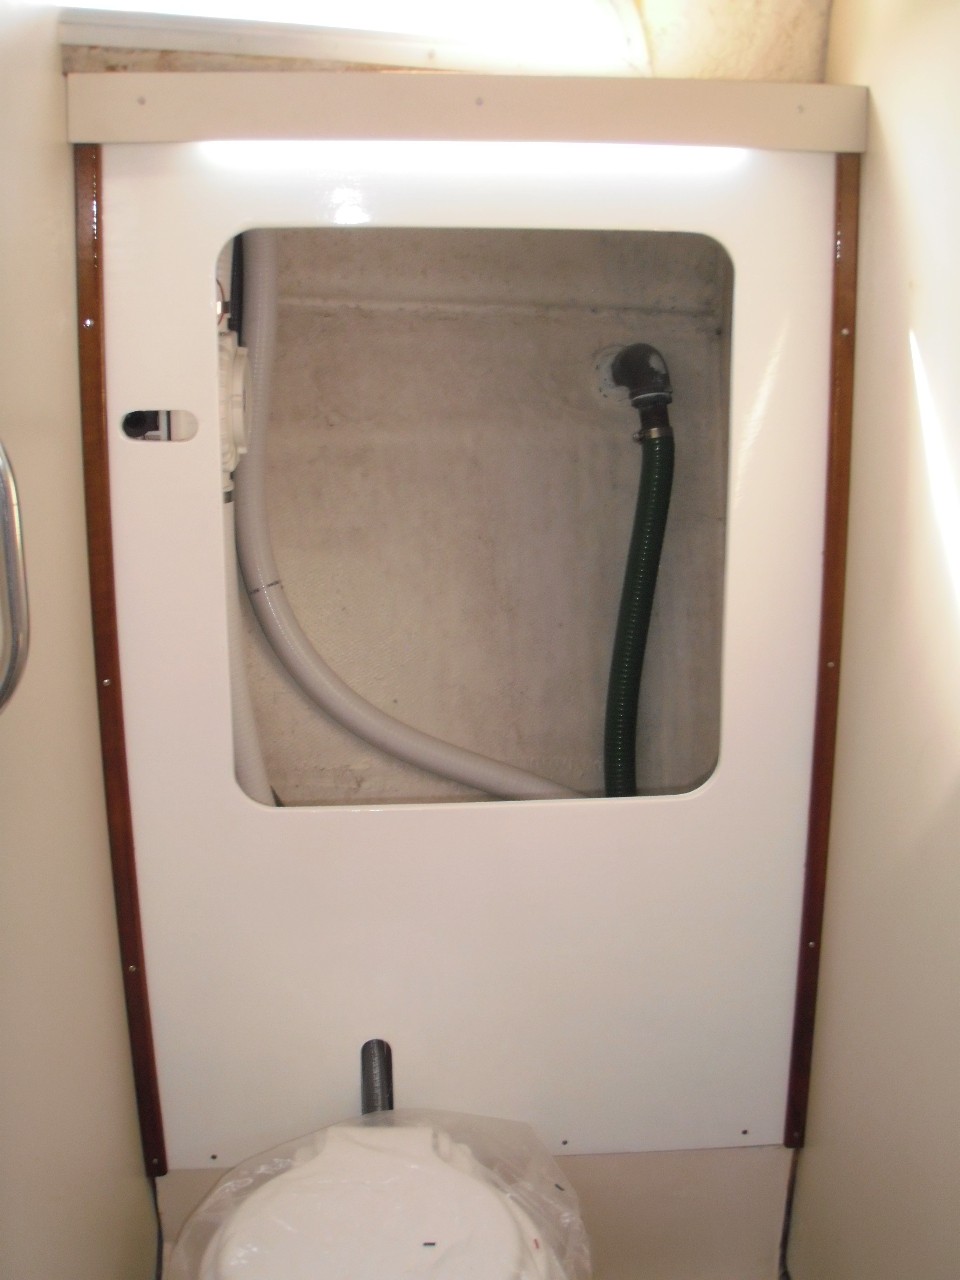
Wednesday turned out to be another cold miserable day with the threat of rain so it was another inside day I started by laminating up the aft bulkhead trim using thickened epoxy to stick it together. Moving on to spiral wrapping the cables for the shower drain pump which is fitted in the heads locker I then gave the locker a good clean out as it was in a bit of a mess after wet sanding the new gelcoat on the front of the locker. I finished up on Wednesday by starting to fit the new steaming light on the mast I had already run in the new three core cable to power the steaming light and the deck light it was a bit of a light fit through the cable grommet but some washing up liquid helped.

First thing today I finished the aft bulkhead trim and screwed it in place the head lining material still needs to be applied to the coach roof sides.


Aft trim/cable duct

The next job today was to complete the new steaming light by drilling the holes for the fixing screws and then replacing the lens and the cover.


New steaming light

Making the most of today's fine weather I got on with applying a coat of underwater primer to the hull I had some left over from the previous boat unfortunately there was only enough to go about three quarters of the way round  also I had run out of masking tape so I stopped a couple of inches short of the boot line looking on the bright side at least today's exercise has given me a rough idea of how much antifoul I will require.


Underwater primer

To finish up today I did a final test fit of the headlining panels for the heads some adjustment was necessary to accommodate the trim pieces for the bulkheads. Next week the weather is looking favourable so the main aim will be to complete the antifouling and get the mast ready to go up.


Friday, 27 April 2018

Internal work

Sanding down the new gelcoat on the heads locker was dragging on a bit so on Monday I made a concerted effort and finished off the job ending up with some fine wet and dry sandpaper. I then fitted the hardwood trim on the right hand side, the left hand side will have to wait until the bulkhead door frame has been replaced. I then replaced the shower drain pump switch and connected the wiring I still have to spiral wrap the wiring and secure it to the bulkhead.


Gelcoat finished

On Wednesday I used the dry weather to attend to a couple of rainwater leaks on the starboard side of the saloon I removed the bolts securing a stanchion base and the midships cleat and built up the area below with epoxy and glass mat to give a level surface onto which,once cured, I could seal the bolts with washers and some closed cell foam tape. While the epoxy was curing I screwed up some cleats to support the headlining panels under the starboard side deck I put some cut outs in the upper side of these cleats to support the lighting cables which will run above the headlining panels.

Today after replacing the midships cleat and stanchion base on the starboard side I spent some time trial fitting some new 4mm plywood panels for the heads headlining after a little bit of adjustment they are now ready to be covered, as there will be a shower installed I will use some foam backed vinyl in this area instead of the van lining carpet used elsewhere.


Port headlining panel

Once I was satisfied with the fit of the headlining panels I fitted the locker front panels on the starboard side of the forward cabin so that I could measure up for the bottom pieces for the lockers on both sides cutting these out will be one of this weekends homework jobs.


Starboard side forward cabin

To finish up today I made a start on making a trim piece to tidy up the laminate around the edge of the forward heads bulkhead where it meets the side of the coach roof and the underside of the side deck. To begin with I cut out a paper template and over the weekend I shall cut out a piece of laminate so that it will be a close fit it will be much easier to close fit a small piece of laminate than to achieve a close fit with a large sheet which covers half the bulkhead. On the left hand side I plan to make another trim piece but to space it off the bulkhead to form a cable trunk to take the mast wiring cables from the exit point in the heads locker, they can be seen in the above photograph of the headlining panel, to a position above the headlining panel and then to the two connection boxes already installed.


The small piece of laminate with the two screws was to cover the cables for the reading light in the forward cabin this will be replaced by the new cover trim.


Friday, 20 April 2018

Cove line

The first job on Monday was to finish scraping the old cove line tape I tried the Detak chewing gum remover which did seem to help soften the old tape particularly in the areas where it was peeling as it allowed the stuff to get behind the tape and soften the adhesive. Once all the tape had been removed and the moulded in line had been sanded I masked it all up and gave it a coat of Pre-kote primer/undercoat this was followed up on Wednesday morning with a coat of Mauritius blue Toplac. I then went on to complete the wet locker in the heads and fitted the remaining LED strip light.


Light in white mode


Red night vision mode

The red night vision lighting does not show very red for some reason probably something to do with the camera it seemed to work OK for the saloon photographs of the night vision lighting.

To finish up Wednesday I made a start on making good some of the scratches in the topside paint by sanding them and giving them a coat of primer/undercoat I have got about three quarters of the way round the hull so far, the aim is to give them two coats of Toplac and then fair them in with wet and dry sandpaper

The first job this morning was to apply the second coat of paint to the cove line and then remove the masking tape when I masked up the starboard side I was running short of masking tape so I used some chap stuff from the pound shop which allowed some of the paint to leech out under the edge of the tape when the paint has properly hardened i will try and clean up the edge along the moulded line with some wet and dry sandpaper. When I painted over the areas of the topsides that I had previously repaired I should have masked up the lower edge of the sheer strake and I ended up with some over painting along the lower edge so to finish off this week I sanded the lower edge masked it up and gave it a coat of Mauritius blue topcoat to tidy it up and then removed the masking tape.


Port side cove line

This weeks efforts do not seem to show a great deal of progress but painting stripes round the hull is a laborious task by the time it has all been cleaned up then sanded and masked up then a coat of primer/undercoat followed by two topcoats then remove the masking tape and its all done from a ladder so one gets a course of step aerobics thrown in for free. 

Friday, 13 April 2018

Navigation lights

Last weekend I finished off the navigation lights ready to install on Monday then Saturday afternoon turned out to be dry so I went down to the boatyard and masked up both boot line stripes on the transom and gave them the first coat of Toplac together with the lower stripe along the sides of the boat which I had previously masked up and primed. Sunday afternoon turned out much the same so I again went down to the yard and put a second coat on the stripes along the sides and across the transom and then removed the masking tape that's the advantage off having the boat in a yard only ten minutes drive away from home it is feasible to nip down and knock small jobs off the to do list.


Rear of port navigation light with watertight connection box fitted

On Monday I started by fitting the port and starboard navigation lights to the pulpit and after connecting them up low and behold there was light which could be seen for miles well two actually according to the markings on the fittings.


Port


Starboard


Port rear view

The next stage was fitting the mounting pad on the transom for the stern light the hole was cut out to clear a rectangular protrusion on the back face of the fitting.


Mounting pad for stern light

Two holes were drilled through the transom to take the cables and the light fitting was bolted through the pad and transom and after connecting the cables together again there was light, also note the completed boot stripes in the photograph below.


Stern light

New Morning has a moulded cove line which incorporates a flower at the forward end which I assume is the signature of the designer Angus Primrose. This cove line had been coloured with a gold coloured tape which was beginning to peel off in a few places so I decided to remove it and then paint the cove line with Mauritius Blue Toplac to match the rest of the hull detail. However after scraping at the peeling areas the rest remained firmly stuck as the proverbial, the usual way of removing this stuff is to use a hot air gun but two problems here I don't have one and in any case we still have no electricity supply so I spent Wednesday and today scraping and sanding the stuff I have got almost three quarters of it off I found that the rounded end of an old hacksaw blade was just ab out right for removing the majority followed by coarse sandpaper wrapped round a piece of round steel bar. I have some chewing gum remover which I got to remove the old glazing sealant in the fore hatch which I will experiment with on Monday to see if it makes the job any easier


Original cove line

The white patches are not where the tape has started peeling unfortunately, its white paint where I had been patch painting the topsides as I intended to remove the cove line I was not so fussy where the roller went.


After scraping and sanding the cove line.


Friday, 6 April 2018

Bit of an all sorts week

The Easter weekend weather was typical Easter weekend cold wet and miserable so I went down to the boatyard and got on with some internal work the first job was to install some electrical connection boxes for the mast wiring, I am not keen on the usual 'watertight plugs and sockets' so I intend to use Scanstrut cable glands and connect the cables internally I fitted two boxes one for the wind instrument cables and one for the steaming/deck light cables I also fitted a connector for the VHF aerial cable the plug for this will pass through the Scanstrut gland.


Scanstrut deck gland


VHF aerial connection and connection boxes

The larger connection box is for the wind instrument cable the smaller one for the steaming/deck light cable with the VHF aerial connector to the right, I do hope that the wind instruments work after all this, the cables will eventually be concealed above the head lining.

I spent some time sorting out some hardwood trim for the heads locker and the wet locker which I cut to length and then varnished over three days. In between I have been sanding back the gelcoat which I had previously applied to the heads locker moulding as it is a bit of an arduous task as I have been doing it by hand although this has the advantage that I can do it wet, dry sanding would spread the horrible dust all over the place even if using a sander with a dust collector this, is going to be a bit of an as and when job I usually do a bit waiting for the kettle to boil etc.

By Wednesday it had been over a week since I put the first coat of Toplac on the various areas of the topsides that I had repaired and so before the second coat could be applied I had to give it all a light sanding and I finally got the second coat applied today. Wednesday also saw me applying two coats of rust converter to the keel hopefully I can apply the underwater primer next week weather permitting I finished up the day by fitting the hardwood trim to the wet locker just have the concealed LED strip light to fit at the top as per the port side.


Wet locker

Today I finally managed to get the second coat of Toplac onto the repaired areas of the topsides and with a bit of time to spare I masked up and applied a coat of primer/undercoat to the lower of the two boot stripes the masking up takes much more time than the actual painting as it entails going right round the boat twice.


Second coat on the transom and boot stripe masked and primed

Some time ago I bought some new port and starboard navigation lights and a stern light, unfortunately the new port and starboard lights do not have a watertight cable entry, I think that they are intended to be fitted directly to a deckhouse with the cables connected internally anyhow I have been thinking of a way to fit them to the pulpit, the originals were equipped with cable glands and dropped onto brackets bolted to a stainless steel plate which in turn was bolted to the pulpit.


Navigation light mounting on the pulpit

I have formulated a cunning plan, as Baldrick would call it, which is to bolt the new lights to the original plates thus.


Rear of mounting plate

The next move will be to fit a watertight enclosure to the rear of the plate unfortunately I could not find a circular one which would fit through the hole in the mounting on the pulpit so after some thought I decided to make one. I obtained a piece of 90mm round HDPE bar from a firm called Direct Plastics, I have used them before and they will supply reasonably small amounts the minimum for round bar seems to be 250mm long, and turned up two round enclosures to which I will fit a cable gland these will then be bolted and sealed to the reverse side of the mounting plate.


Enclosures one to the left showing recess for cable connections in the reverse side

The new LED stern light will be fitted at the top of the transom as I assume that the original was however the angle of the transom would leave the light pointing upwards so I have turned up an angled pad, again from the 90mm HDPE bar, which will make a level mount.


New stern light


Mounting pad for stern light

It looks like another wet day tomorrow so this weekends homework will be to finish off the navigation lights so that they can be fitted next week weather permitting.


Friday, 30 March 2018

It was almost spring

Well spring almost arrived this week I set to on Monday to finish painting the various areas of the topsides where I had carried out repairs I had previously primed and undercoated them last year before the winter weather put a stop to any further work. I plugged in the random orbital sander and switched on, dead as a dodo it appears that the local lowlifes had broken into the adjacent industrial estate in search of anything worth removing and had cut the power to the boatyard so I ended up having to hand sand before applying a coat of Toplac Mediterranean White which appears to be a pretty good match to the existing. I had planned to do the second coat on Wednesday but low and behold we appear to be back to winter again cold and wet all day fortunately I had a plan 'B' I had finished painting the front panel for the wet locker in the heads so I got it fitted into place so that I could measure up for the hardwood trim pieces for each side these will be a homework job to sand and varnish.


Wet locker front panel

I replaced the engine heat exchanger drain cock which was leaking slightly when I test ran the engine I taken it home, stripped it and lapped it in with some fine grinding paste it is just a simple taper plug cock the repair of which I have covered before in an earlier post.

I then moved on to the heads locker opening which I had previously carried out some fibreglass repairs to I sanded back all the areas where I had filled various holes and the infill to the top of the opening.


After sanding

The remaining hole is for the shower drain pump switch, the two ends of the opening have been left a bit uneven after they were cut out and looking at the Yacht Grot post of a Moody 33 for sale on Youtube the width of the locker doors seems to indicate that this probably dates from the original construction. I had been in two minds whether or not to do something about it and as I had brought the jig saw down with me, just in case, I decided to tidy them up but lo and behold we still have no power so I had to use a hacksaw with the blade turned 90 degrees and do it by hand.


Ends of the opening tidied up

Today turned out to be another miserable wet day no chance of any external painting so I decided to get on with gel coating the front of the locker the weather was just about warm enough and by warming the resin by putting the tin in a bucket of warm water and using the maximum 4% catalyst I applied two coats of gel coat followed by a third coat of gel coat with 2% wax added to form flocoat as I had previously done in the galley. Once it has fully cured I shall sand back with wet and dry to leave a smooth finish I don't know if it is me or not but trying to get a smooth finish applying gel coat with a brush is pretty well impossible it will therefore take a bit of sanding back.


After gel coating

In between coats of gel coat I stripped and lapped in the exhaust manifold drain cock which had also been leaking this one was going to be awkward to remove, possibly having to remove the exhaust manifold to do it, so I did it in place hoping that I didn't drop any small bits under the engine, there is not much room under there as the bilge suction hose and the raw water hose run under there plus the fact there is very little room between the bottom of the engine sump and the bottom of the boat and fortunately when I dropped the inevitable small washer it fell on the outboard side of the engine bed and was thus easily retrieved. 


Friday, 23 March 2018

Cold again

The freezing weather returned last weekend so nothing much got done on the homework front, the original plan had been to start painting the front panel for the wet locker but it was much too cold for that although by Tuesday it had warmed up sufficiently to get it sanded and the first coat of primer/undercoat.

Monday was a non starter it was freezing cold so I went shopping for the colloidal silica so that I could carry on with various bits of filling and fairing once the weather improved I finished up the day by cleaning up the repairs to the heads internal and then arranged some timber to support the mast so that I could take the weight off the pulpit in order that I could unbolt the after end and install the cable for the navigation lights. Wednesday dawned warm enough for epoxy to cure so the first job was to unbolt the after end of the pulpit on removing the bolts it was evident that the opening for the cable was well out of line with the opening into the pulpit and also there was quite a bit of spring back in the pulpit so I decided to fill all the holes and start again from scratch, there was also some stress cracking in the gelcoat which I opened out with the tungsten carbide scraper before filling with thickened epoxy. Once this was done I went round and did all the filling around the heads internal moulding there were a number of redundant holes which I could find no use for so they all got filled with thickened epoxy. Taking advantage of the fine weather I sanded back various bits of filling below the waterline including the infilling of the old heads discharge valve and the old paddle wheel log openings these were filled quite some time ago but I had not got around to finishing them off.

I started off today by sanding back the filling to the pulpit bolt holes, cable opening and the stress crack repairs, the misalignment of the cable opening and the amount of spring back in the pulpit can be seen from the photograph below the infilled hole on the right hand end is the old cable opening


Port side 

After sanding I allowed the pulpit to fall into its natural position and then marked the holes for drilling I used a countersink drill to take the sharp edges off the holes hopefully this should stop any further stress cracking. Once all the holes were drilled I then used my original draw wires to pull in some 1.5mm tinned two core flex for the navigation lights the starboard cable went easily but on the port side the draw wire parted company with the new cable and it took quite some time to fiddle the draw wire back up the pulpit tube however I eventually triumphed and the pulpit was re secured, this job ended up taking a good part of the day. Because of the anchor well in the fore deck the pulpit bolts are difficult to reach it entails laying on one's back half in the cable locker and reaching up the side if the said well also the gap on the port side is much narrower than the starboard side, the anchor well is not central in the fore deck.

One further epoxy job was to re fix a handle on the garden shears it was easier to do it on the boat than take all the epoxy stuff home plus I also would have a use for any surplus epoxy, this was used to fill various redundant holes in the aft cabin bulkhead which I presume were for the old electrical installation these have a habit of growing over the years each addition seems to require its own dedicated hole to be drilled in a bulkhead.

I finished up the day by fitting the port side locker front panels in the fore cabin the GRP will eventually be lined with carpet but this is a future rainy day job as the main aim now is to get the boat in the water as soon as possible.


Port side fore cabin