Friday, 26 June 2020

Wood and varnish again

I haven't done a great deal this week the aim was to finish varnishing the last of the wood trim and fixing it in place. I started in the aft cabin with pieces to cover the forward and aft end of the locker panels on both sides, the photographs show the port side.


Aft cabin forward end 


Aft end

I then moved on to the long lengths either side of the mast compression post in the saloon, the piece on the starboard side was an exact fit between the clock mount and the compression post which makes picking up the keyhole plate mountings for the clock much easier, this was purely accidental.


Trim either side of compression post


The next move was to finish the trim round the heads internal moulding there is a cover strip over the join between the locker moulding and the sole moulding under the doors. the vertical trim to the left hand side of the doors and finally the trim at each end of the worktop, this part is now pretty much complete.


Heads moulding

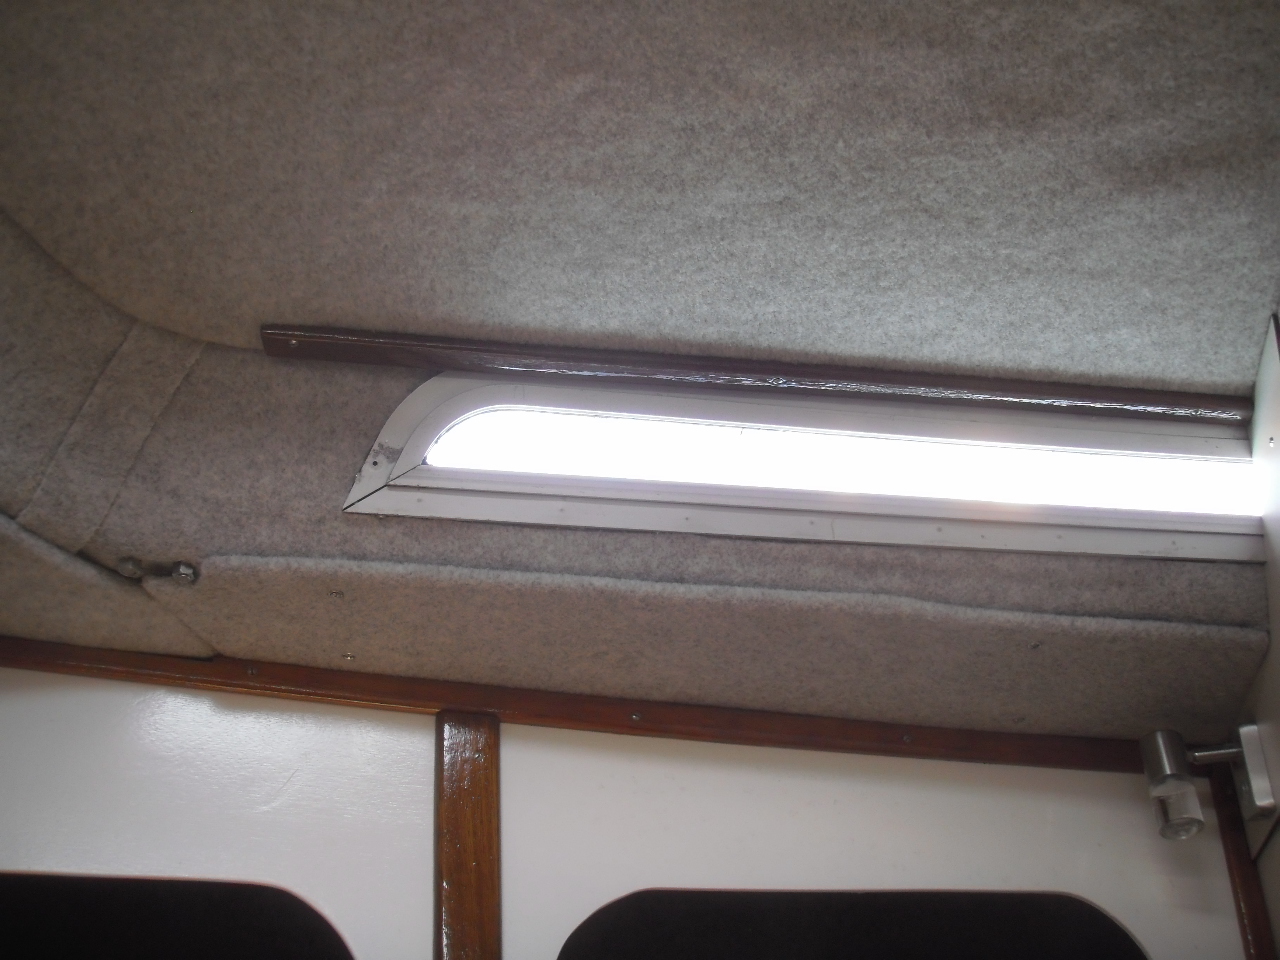
The last two pieces were above the windows in the forward cabin they help support the head lining and also originally provide something for the curtain track to be secured to.


I have now used up all of the original hardwood that came with the boat most of it has not been put back in its original position, but I have tried to make the best use of it without too many offcuts. Reuse, recycling or upcycling whatever you want to call it has entailed plugging some of the original screw holes which I think adds to the history well that is what I will claim anyway.


Friday, 19 June 2020

Wood and varnish

I spent some time last weekend plugging redundant holes in various pieces of hardwood trim so that on Monday I could cut them to length and start sanding them ready for varnish. I have now just about used up all the remaining timber, there are just a few short offcuts left, I may have to source some more to finally finish trimming round various panels. Once the sanding was complete I have spent most of the week varnishing the various pieces.


Varnished trim

I also managed to get three coats of varnish on the mast compression post.


Varnished compression post

This afternoon I fitted the first piece of trim where the dinette internal moulding abuts the compression post, I think that the original installation was done with a jigsaw and a very shaky hand the trim is required to cover the gap.


Gap between the moulding and compression post

On the inside of the moulding I screwed a piece of timber to the compression post so that when the trim was fitted the screws went through into the timber backing so that the moulding is firmly secured, the backing timber can just be seen through the gap.


After fitting the trim

The plan for next week is to finish the varnishing and then fix all the trim pieces in place


Friday, 12 June 2020

More fibreglass

The first job this week was to start laying up fibreglass in the repair to the heads sole the area in way of the cut out is still a little low but I was thinking possibly finishing off with a piece of contrasting laminate to form a kick plate below the door.


Repair to sole

I have used polyester resin for this repair as the intention is to finish off with gelcoat which takes to polyester more effectively than epoxy, however on opening my tin off white gelcoat I found that it had gone off apparently this stuff has a limited shelf life I will need to order some more from East Coast Fibreglass Supplies before I can go any further. I still have a pile of original hardwood trim some of which I had sanded and varnished ready for fitting so after a bit of a sort out I found the piece for the forward end of the galley moulding and fitted it in place.


Trim fitted to galley moulding

I have identified several more pieces  which need sanding and varnishing so that will be a homework job for this weekend providing the gloss varnish has not gone hard in the tin. going by the present record it does not look promising although this tin is of more recent purchase. To finish the week I sanded the mast compression post ready for varnish next week on this boat it is in two pieces one on each side of the bulkhead, I made rather a mess as unbeknown to me the dust bag had become detached from the random orbital sander and it had blown dust everywhere before I realised what had happened.


One half of the compression post sanded ready for varnish


Friday, 5 June 2020

Back to the heads

The first job this week was to sand the forward heads door it seems that the original finish had been removed at some time and replaced with varnish however my tin of satin varnish which had not been opened for several years had gone solid so that job was put on hold until the chandlers reopen.
I then moved on to the forward doorway, I had already screwed and glued a piece of plywood into the base of the door opening to reduce the size of the gap at the base of the door, space has been left for a section of the door frame. Once that was done I turned my attention to the sole moulding for some reason a piece had been cut away under the door I am unsure why but I decided to reinstate it.


View showing cut out in the sole moulding

I have been thinking of a way to infill the cut out for quite some time  one of those jobs that was always thought about and then relegated to the too hard list I finally decided that it was time to get on and do something with it. The sole moulding was not tabbed to the bulkhead as would be expected but had been secured with screws however I don't think that these were original, stainless steel posi type, and there is a bit of a gap between the upstand and the bulkhead, however the sole moulding is secured to the hull also it is secured to the aft bulkhead by screws. After some thought I decided to build up the forward bulkhead to meet the so;e moulding and then use the bulkhead as backing to the infill of the upstand. to start with I removed the original blue laminate as I guessed that resin would not adhere very well to it, I also removed a piece of the new white laminate on the right hand side of the door opening to square everything up the cordless multi tool was just the job for this. Once this was done  I gave the exposed ply a good sanding to remove the old adhesive.


Bulkhead ready for glassing

I then used a mixture of woven rovings and chopped strand mat to build up the bulkhead to the level of the back of the upstand, there was no particular reason for using this combination of glass mat it was just what I had in stock.


Bulkhead glassed up

That is sunshine coming in through the window in between the rain this afternoon. Next week the plan is to build up the upstand from the bulkhead I don't think that it will be an invisible repair so I think that I will gelcoat it and leave it as a bit of a feature. Strangely the moulding for the heads sink unit is tabbed to the bulkhead but on the forward face of the bulkhead the forward cabin internal moulding again is not tabbed to the bulkhead in fact on the port side there is quite a large gap I am not sure what has gone on here but it looks as though the boat was originally built this way. 


Friday, 29 May 2020

Boris has said I can go out to play

At last the marina reopened a couple of weeks ago and I have been able to get down to the boat again, she was still there although looking a bit grubby it is amazing how dirty a boat will get even internally. The engine started first time after the enforced lay off. This week was the first time I had got down to some serious work I started by having a good clean up internally and then filled several holes in the lifting section of the cockpit sole, originally there were two latches which had rusted away and when I removed them I filled the fixing holes with nuts and bolts I hadn't sealed them and they always let in some rainwater so I removed the bolts and filled the holes with thickened epoxy after putting a layer of glass mat and epoxy on the underside to stop the filling from falling through.

Today I started on improving the two doors to the heads, when I bought the boat the doors and frames had been removed and the openings in the bulkheads opened up to increase the height of the doorways. When I came to address the replacement of the doors I decided to reinstate the round topped opening so that I could reuse the original doors subsequently I have been thinking that it would have been better to have made new doors and kept the enlarged opening as the new door frame would have been a much simpler proposition particularly as the original doors are not in a particularly good condition. However I didn't so today I took another look at the two doors and decided to see if I could tidy them up. The doors are veneered on one side with the foil backed wood veneer used on the rest of the woodwork, I don't know what sort of coating Marine Projects used to finish it with but it is certainly tough and awful stuff to sand off, the inner faces are finished in the same pale blue laminate used for the heads bulkheads. The door from the saloon had been over coated in varnish which looked a bit thick and tarry so I started trying to sand it back but it just clogged the sandpaper so I tried using the tungsten carbide scraper which removed the old varnish easily although it did not have much effect on the original finish.


After using the scraper

Just removing the old varnish has made a considerable improvement as can be seen above.


After removing all the old varnish

I am not sure at the moment how I intend to finish this door off but it does look much better I may try and give it a go with some wire wool. The next job will be the forward door I don't know what this one has been over coated with we shall see next week.

Friday, 24 April 2020

I am still about

I thought that it was about time that I put something new on this blog. I had a heart attack the day after Boxing Day three o'clock in the morning woken up with severe chest pains so called an ambulance and was carted off to hospital where I had a stent put in. This put an end to work on the boat for the time being I then went back for a planned visit to have another stent put in after which I started to get fit again, I was just thinking about ordering the materials for the heater installation when along comes the coronavirus and lockdown and the marina is closed. I had originally planned for a lift out before Christmas but the hard standing was full up and so thoughts turned to March but that has gone by the board I will have to wait and see how things pan out in the next month or so. However the time has not been totally wasted I have managed some time in the workshop with my other hobby of model engineering which has been on the back burner since the New Morning project started. This week I have spent some time on an outboard which a friend won for me on E-bay it is a 2hp Evinrude it apparently dates from 1981 but it did not cost me much so if it turned out to be a bit of a lemon then I would not have lost much.


2hp Evinrude

I set the engine on a piece of timber held in the bench vice then took out the spark plug and checked for a spark no such luck so I decided to remove the flywheel and check the points etc. The first task was to remove the top shroud which is secured by four bolts.


The view above shows the bolts securing the top shroud they are the ones that have been slackened back not easy to see. Once the shroud was removed the flywheel is exposed , it is retained by a central nut and washer.


Flywheel securing nut

The flywheel is fitted on a taper with a woodruf key and requires a puller to remove it, I made a simple puller from a piece of scrap plate, its not pretty but it does the job, I drilled three holes in the plate to match the three tapped holes in the flywheel. After removing the securing nut I fitted the puller with three 1/4" UNC machine screws in the tapped holes and tightened them up, there was a bit of a crack and the flywheel came free.


Puller in position

After removing the flywheel I checked the ignition system, just a coil,contact breaker points and a condenser which all looked in good order.


Ignition system

I cleaned the points with some fine wet and dry, it should be a proper points file but I did not have one. I had already removed the petrol tank so gave it a clean out with some fresh petrol before replacing it and the flywheel.


Tank and flywheel replaced

The tank is secured by a couple of spring clips which fit through a couple of moulded lugs on the base of the tank one of them is missing on this engine.


Tank securing clip on the left

I removed the float bowl from the carburettor with the intention of cleaning it out but it was remarkably clean so I checked the jets and replaces it. It was then just a matter of replacing the shroud and filling the tank with some fresh petroil mixture and pulled the cord, after several attempts it started and after some adjustment of the jets it ran quite well. I need to rig up a water supply so that I can give it a proper test run but it looks promising, now all we have to do is get past this virus nonsense and I can try it on the water.


Friday, 20 December 2019

Heater installation

This week I have made a start on the prep work for the heater installation, the first task was to seal up a number of redundant openings between the void space and the engine space, the largest being about 32mm diameter I cut out a plywood disk with a hole saw and sealed it in place with some thickened epoxy the remaining couple of holes were only small so they were filled with thickened epoxy. The plan is to take the air supply to the heater from the void space which has a direct connection to the saloon above the head lining in the quarter berth, this should hopefully give a re-circulatory air flow with sufficient fresh air make up via the dorade vents in the saloon to prevent condensation. I then moved on to cutting the openings in the various bulkheads for the hot air duct work using a 92mm hole saw, there are several of these openings that had to be cut blind particularly those behind the up stand in the quarter berth and the one to the aft cabin.


Two openings formed under the galley sink

I have shown a couple of the openings these are the ones that can be seen. That will be about all until after Christmas and I have obtained the necessary kit for the installation so I wish you all the seasons greetings, or bah humbug, depending on your views on the festivities.