Keel bolt
As can be seen the threads are in surprisingly good condition only the hexagon head is missing driving the socket on gave it an almost splined head, the barrel shape of the remains of the head made it difficult to keep the ring spanner straight which led to it slipping and chewing up the head with the socket drive it was much easier to hold the socket square which reduced the tendency to slip. The bolts are 11/8" UNC which fortunately is still readily obtainable albeit the one I got is a bit long but it can easily be cut down.
New and the old
Last weekend I cut out the holes in the worktop for the galley sink and the taps so once the euphoria of getting the keel bolt out had worn off I got on with fitting the worktop and sticking it down as with the heads worktop I stuck it down with PU40, half the price of Sikaflex, adhesive sealant from Toolstation and once it had cured I secured the sink in the same manner then connected up the waste and fitted the mixer tap.
Trial fit
Sink and taps installed
Sink waste connected
The two flexible pipes are the hot and cold tails for the mixer tap that is as far as it goes at the moment until I start the hot and cold water installation. I ran the cables to the shower drain pump and made a temporary connection to test the waste arrangement it all seems to work quite well the pump still requires a manual switch fitting in the heads to complete the installation.
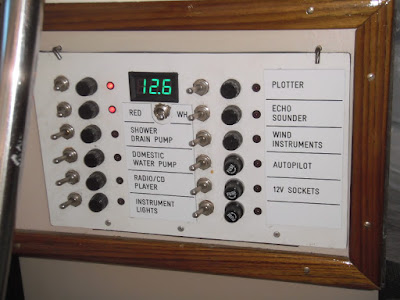
After reading a previous blog post my youngest daughter offered to arrange for the supply of the labels for the electrical switch panels from a company that she uses in her professional capacity. Just a matter of producing an auto cad drawing emailing it to the company who laser cuts them and then waiting for the postman to deliver them, they arrived this week so it was just a simple peel and stick operation to fit them.
Switch panel labels
To finish off the week I have started on the internal arrangements for the crockery stowage it needs a means of stopping the stuff moving about once it has been put through the slots I am working on the idea of a ply base with vertical dowels to restrain the crockery not much to see yet just some bits of ply.
The homework job this weekend will be to cut the new keel bolt to length and produce a new backing plate for it so that I can hopefully put it all back together next week and reinstate the watertight integrity of the boat and although I have been aware for some time that the keel bolt would need to be replaced the hole in the bottom was one of those one step backwards moments which touch wood there haven't been very many of to date.


I know its been a while since this part of your project but would you happen to remember how long the keel bolts were?
ReplyDeleteI just discovered your blog and it's been a fantastic find for me as I have a 1977 33 Mk1.
Hi Peter sorry for the delay but I only just picked up your comment. I cannot remember the exact length of the original bolt but the new one in the photo is 3.75" or 95mm in new money, that is the length of the threaded part. I did a rough scale off the photo which would indicate a length of 2.5" which sounds about right. The only other point that I would make my boat was built in 1975 but there is a thread on the Moody Owners group website where a slightly later build than mine has been reported as having 32mm keel bolts so it looks as though if replacing bolts a careful check needs to be made before ordering new bolts. I hope that this is of use and feel free to contact me if I can be of any further assistance.
DeleteRegards
Peter
Do you happen to remember how long the keel bolt you took out was?
ReplyDeleteMy bad, I just saw the response you sent back to me some time ago. I'm so useless with computer stuff!
ReplyDeleteThank you