Friday, 11 October 2019

Still back of the chart plotter

Over last weekend I finished the access door and varnished the edge trim so that on Monday morning I could fit the door and the latch. Also I roughed out some teak for the edge trim around the enclosure ready for final fitting.


Example of the teak from cockpit gratings

The first job this week was to fit the door to the enclosure and then fit and adjust the latch this was made easier because I could remove the enclosure and work from the back. Once the door had been fitted I went on to replace the enclosure before finalising the edge trim I also cut some trim to fit around the top of the enclosure, this was cut from some of the original trim which came with the boat. The edge trim was then fitted and given its first coat of varnish.


View showing edge trim and door fitted

I still have to finalise the edge trim for the outboard side of the enclosure, the bottom section needs to be wider so I will have to go through my stock of used teak. The trim for the top of the enclosure was also given its first coat of varnish, this will be fitted once the varnishing is complete.


The top trim after the first coat of varnish

To my mind the door looks a little on the heavy side, it is made in the same manner as all the other locker doors on the boat but being much smaller leads to it looking a bit on the heavy side particularly the hinges. Also I haven't made up my mind whether or not to put a piece of trim over the junction of the two laminate panels just below the door, I shall give it some thought over the next week or so. This has been another of those short posts that seems which does not seem to reflect the amount of work involved in forming the trim from the old grating parts and its subsequent fitting, woodwork is not my strong point having been trained in iron fighting however I am fairly satisfied with the work so far.


Friday, 4 October 2019

Back of the chart plotter again

I had originally planned to sail across to the Walton Backwaters this week but by last Sunday the weather was looking decidedly poor with the remnants of hurricane Lorenzo being forecast to be affecting the weather by the end of the week so the plan was cancelled. I did manage a brief trip down the Swale on Monday afternoon, there was only a light breeze, in reality I could have probably got to Walton on Monday and returned today or tomorrow.

Anyhow back to work over last weekend I cut out the opening for the door in the enclosure and cut the edge trim for the door and then painted the back of the door so that it is now ready for final assembly. On Wednesday I did a final fit of the enclosure and then epoxied some wooden blocks to the bulkhead to support the enclosure.

The first task today was to remove the redundant Stowe echo sounder unit from the cockpit bulkhead, I had replaced it with a NASA unit as the Stowe transducer did not seem capable of operating from inside the boat, I then cut out a blank to cover the opening in the bulkhead. I have been thinking of utilising this opening possibly for an extension speaker for the VHF so the blank is sort of semi temporary at the moment its main purpose is to keep out the rain.


Echo sounder opening blanked off

The next move was secure the enclosure to the wooden blocks with screws so that it can be easily removed if required.


Enclosure secured in place

All that is required now is to make up some hardwood trim for the enclosure similar to that already fitted in the saloon, I still have some of the old teak from the cockpit benches on Shuda, my last boat, hopefully there will be enough and then finish off the assembly of the door


Friday, 27 September 2019

Back of the chart plotter

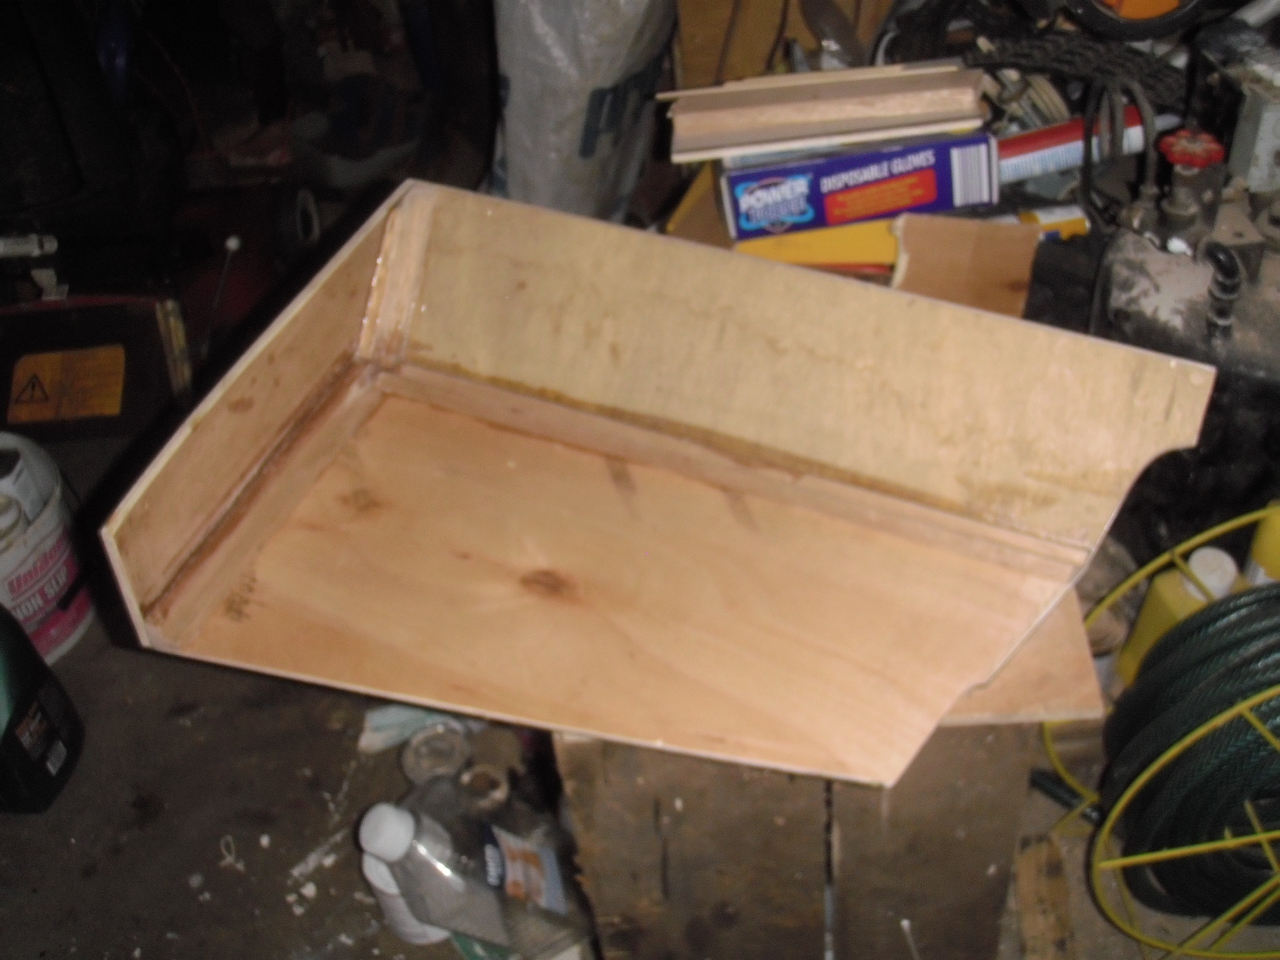
I have spent this week making up the enclosure for the rear of the chart plotter, I cut out the ply and epoxied the whole thing together again I have been using materials that I have to hand the ply is some 4mm WBP that I had left from the headlining project but as it will be covered with laminate which is 4mm thick it should be sufficiently rigid, the framing is left over merenti hardwood from the heads door frames.


Reverse side of enclosure


Laminate applied


Final piece of laminate applied

The laminate still needs to be faired round the edges so that the enclosure is a snug fit, also the opening for the access door needs to be cut out this will be this weekends homework job along with finishing off the door, I have cut out the hockey stick section edge trim it just needs staining and varnishing and the door hardware fitted.

This has been a bit of a short post which doesn't reflect the work done on the enclosure cutting and fitting to the structure of the boat which is neither straight nor square which can be somewhat time consuming


Friday, 20 September 2019

Enclosing the back of the plotter

The first job on Monday morning was to fit the last piece of corner trim in the forward cabin I had roughed it out over the weekend so it just took a little bit of final fitting.


The final piece on the starboard side

After the final piece of trim was fitted there was time to potter off down the creek for a couple of hours, there was not a lot of wind but I managed to drift down as far as the entrance to Milton Creek, unfortunately the County Council built a new road bridge across the entrance with a fixed bridge so the only access is for motor boats these days.

The next project is to tidy up the back of the cockpit bulkhead in way of the chart plotter etc. It has been one of those jobs I have been meaning to get stuck into for some time as one of my pet hates is yards of exposed cabling.


Back of the cockpit bulkhead

The plan is to build an enclosure around the area with a hinged access door, the door will be the same pattern as the other recently completed locker doors. The enclosure will be built in ply lined with some of the laminate used on the rest of the bulkheads etc. Over the last weekend I sorted through my stock of ply and laminate etc and found sufficient for the job, so for the remainder of this week I have been putting some of the pieces together.


First piece of the enclosure

The original reason for the chamfer at the bottom of the enclosure was that I didn't have a large enough piece of laminate to line the whole front, this was one of the reasons I hadn't done anything with this job I was still thinking of a way round the shortage of material, it finally came to me over the weekend. The chamfer also has the advantage that it will make the enclosure much less obtrusive. I have cut and shaped the piece of ply for the bottom edge of the enclosure and over the weekend the homework job will be to get some of the pieces assembled


Friday, 13 September 2019

Bum straps and corner trim

I started this week by finishing the lower corner trim for the port side aft in the forward cabin and then cutting and fitting the piece for the starboard side.


Starboard side


Port side

I went to the chandlers on Monday to pick up some Y10 cleaner, which is effectively oxalic acid mixed with a jelly like substance to return it in place while it does its stuff. I have two bum straps for the chart table and the galley, these provide some support at the chart table and the galley especially when on port tack, unfortunately they were both heavily rust stained and the plan was to use the Y10 to remove the stains unfortunately the local chandler was fresh out of Y10 but he had an alternative which is probably very similar.


Alternative to Y10


Rust staining

I applied the stain remover as instructed and left for an hour, while working on the corner pieces, the first application removed the lighter staining but the heavier staining required several applications to remove it all but on the whole the straps came up pretty well and after a good wash off they look quite presentable


Rust stains removed

To finish off this week I started on the trim pieces for the forward end of the forward cabin, the bulkhead here is not a pretty sight.


Port side forward bulkhead

I managed to cut out and fit the trim piece for the port side which now much improves this area, which just leaves the starboard side I have marked out the laminate for this area and will cut out over the weekend ready for fitting next week.


Port side forward

Unfortunately the forward bulkhead is painted as I had run out of laminate, I have made the trim from odd offcuts of laminate as in other areas hence the difference in colour.


Friday, 6 September 2019

Corner trim again

I did intend to have a brief trip out into the Swale on Monday however when I started the engine the oil pressure gauge went full scale I had previously experienced this problem the oil pressure is fine it is an electrical fault due to a high resistance in the circuit. the resistance of the oil pressure transmitter increases as the oil pressure increases. The wiring harness is split and then reconnected with a chocolate block connector adjacent to the engine and this is where the faulty connection is, the metal parts of the terminal block are rusted and the screws are rusted solid. In order to effect a temporary repair I bypassed the connector and voila the gauge is reading correctly again. The replacement of the chocolate block is on the list of jobs for the winter possibly with a proper connector strip with ring terminals or a multi pin plug and socket.

The rest of this week has been spent trimming the corners in the forward cabin, I have completed the after end where the bulkhead joins with the coach roof and replaced the reading lights and then moved on to the aft corners under the lockers I have cut the port side fairing piece and it just needs to be cleaned up and screwed in place.


Port and starboard fairing pieces complete


Port aft corner below locker


Fairing piece cut to shape

Below is a photograph of the fairing piece for the starboard side of the heads which I omitted from last weeks post.


Not a lot has been achieved this week the rest of the time has been spent chatting and drinking tea boatyards can be quite sociable places at times I am not sure if this is good or bad, I would like to think it is generally a good thing.


Friday, 30 August 2019

Corner trim

Apologies for not posting last week but I took a day off on Friday and went sailing, I did an Isle of Sheppey circumnavigation with number two daughter who was keen to see the Kingsferry bridge lifted from the wet side. However I did finish the fake teak on the heads bilge access hatch which has made a major improvement.


For the remainder of last week and this week I have been making some corner trim pieces from the laminate used to cover the bulkheads to tidy up the corners where the bulkhead meets the side of the coach roof. I have completed the two forward corners in the saloon and the starboard forward corner in the heads, the port side was done some time ago, and made a start on the two aft corners in the forward cabin. The previous owner had already lined most of the bulkheads when I  bought the boat but there was still some final trimming to be carried out particularly on the bulkhead between the heads and the forward cabin as it bridges the single window that runs between the two spaces. My original plan had been to use teak but as I had a large amount of laminate offcuts which would probably been binned at the end of the job I put on my environmental hat on and recycled or upcycled it instead.


Saloon corner trim


Aft corners of the forward cabin

The above photographs show the aft corners of the forward cabin and the gaps that need to be covered can be clearly seen. I have cut out the port side trim piece and profiled it so that it makes a good fit where it abuts the window it still needs some final finishing unfortunately the photograph is not too clear because of all the light colours and the sun shining through the window.


Port side trim piece in place