Friday, 19 May 2017

Another piece of the puzzle

Most of the starboard side of the saloon is an open shelf which as far as I can make out had another shelf about halfway up.The forward end bulkhead carries the chain plate for the starboard lower shroud. I have been thinking about this area for some time and have decided for the time being to just line it out with some of the van lining carpet to tidy up the area and make up a timber cover to fit over the chain plate bolts.


Starboard lower shroud chain plate bolts

While searching in amongst the pile of bits in the aft cabin I came across this which is the original cover trim for the bolts the photograph below shows it after I had sanded and varnished it the notch I assume is for the original shelf.


Cover trim for chain plate bolts

After applying some carpet and fixing the cover trim it now looks like this.


The rest of the week has been spent lining out the heads locker and the galley crockery stowage with more of the ubiquitous van lining carpet which has then allowed me to secure the front panels once this had been done I could get on with fitting some of the timber trim which I had varnished last weekend the fiddle rails to the galley and heads worktops have also been fitted I used some self tapping screws into the edge of the solid laminate backed up with some PU40 adhesive sealant to keep out any water which may be splashed onto the worktop. I still have not decided on doors for the under sink locker I have been looking for something in solid wood off the shelf and at a reasonable price but at the moment all that I can find to match the criteria are louvre doors unfortunately the available sizes don't seem to match the openings I am looking for three pairs of doors so that I can do the aft cabin and the heads lockers as well.


After dismantling the old cockpit bench gratings I had some 'L' section teak sufficient to trim the lower edges of the laminate on the aft saloon bulkhead this was cleaned up, cut to length and varnished. The remains of the rebates for the original hinges on one of the pieces can just be seen in photograph below I have left it as a link to the original use of the timber, I know very arty farty or even trendy if you like it will be semi hidden along the lower edge of the piece.


View showing hinge rebates


Port side aft bulkhead


Starboard side aft bulkhead

I have just about run out of the teak from the old gratings I have just enough to finish off round the engine panel and the new wine locker. However there is still some teak trim in the pile in the aft cabin some of which was I believe cover strip which was fitted to conceal the joints in original laminate lining on the heads bulkheads I aim to recycle, or is it upcycle these days, to provide trim for the heads lockers.




Friday, 12 May 2017

Locker doors

I don't seem to have achieved an awful lot this week but it seems to go like that now and again I have made and fitted all the outstanding locker doors for the heads and the wine locker. To finish off these doors I had to recycle some laminate from the rotten locker front panel from the fore cabin this meant removing the Evostick from the back of the material fortunately I still have some of the Detak chewing gum remover that Hadlow Marine Windows supplied for cleaning the old sealant from the fore hatch glazing this is quite effective if a little slow I probably wouldn't use it for large areas though.


Wine locker


Heads locker

The varnishing of the timber trim pieces for the galley didn't get done over last weekend other things got in the way however I got the first coat of varnish on during the week the aim is to finish them off over the weekend so that it can all be fitted next week. Also I got the crockery restraining device painted so that this area can be finished off next week.

I have been giving some thought to doors for the under sink lockers in the galley and the heads and also the steering gear compartment in the aft cabin as my woodworking skills are not up to making them I was hoping to be a able to find some solid timber ready made doors at a reasonable price however most of what I could find fail at the reasonable price hurdle but also non standard sizes are a problem I can get louvre doors at a reasonable price but again sizes are a problem I shall keep looking.

Friday, 5 May 2017

New keel bolt fitted

Last weekend I cut one of the new set screws to length and then set it up in the lathe and faced off the end then finished off by putting a chamfer on the first thread.


New keel bolt

Once the bolt was finished I set up a piece of 3/8" plate in the four jaw chuck and bored out a 11/8" clearance hole to produce a backing plate for the new bolt.


Boring the new backing plate


New parts and old bolt

On Monday morning I greased up the bolt with some water resisting grease gave the backing plate a good dose of PU40 sealant and inserted the bolt I was aiming for a torque of around 200 ft/lbs but my torque wrench would not go that far and trying to apply that amount on two long socket extensions was always going to be difficult so after I had got as far as I could I used the 65:1 drive to just tighten the bolt a little further. Apparently the Idea is to not tighten the bolt so much that it starts to crush the GRP moulding and this torque figure is considerably less than the maximum torque setting for the bolt in question especially I would think when using bolts of this size.


New keel bolt and backing plate

Now that the new keel bolt is in place I can get on with building some form of mounting for the batteries so that they can be secured to prevent any movement.

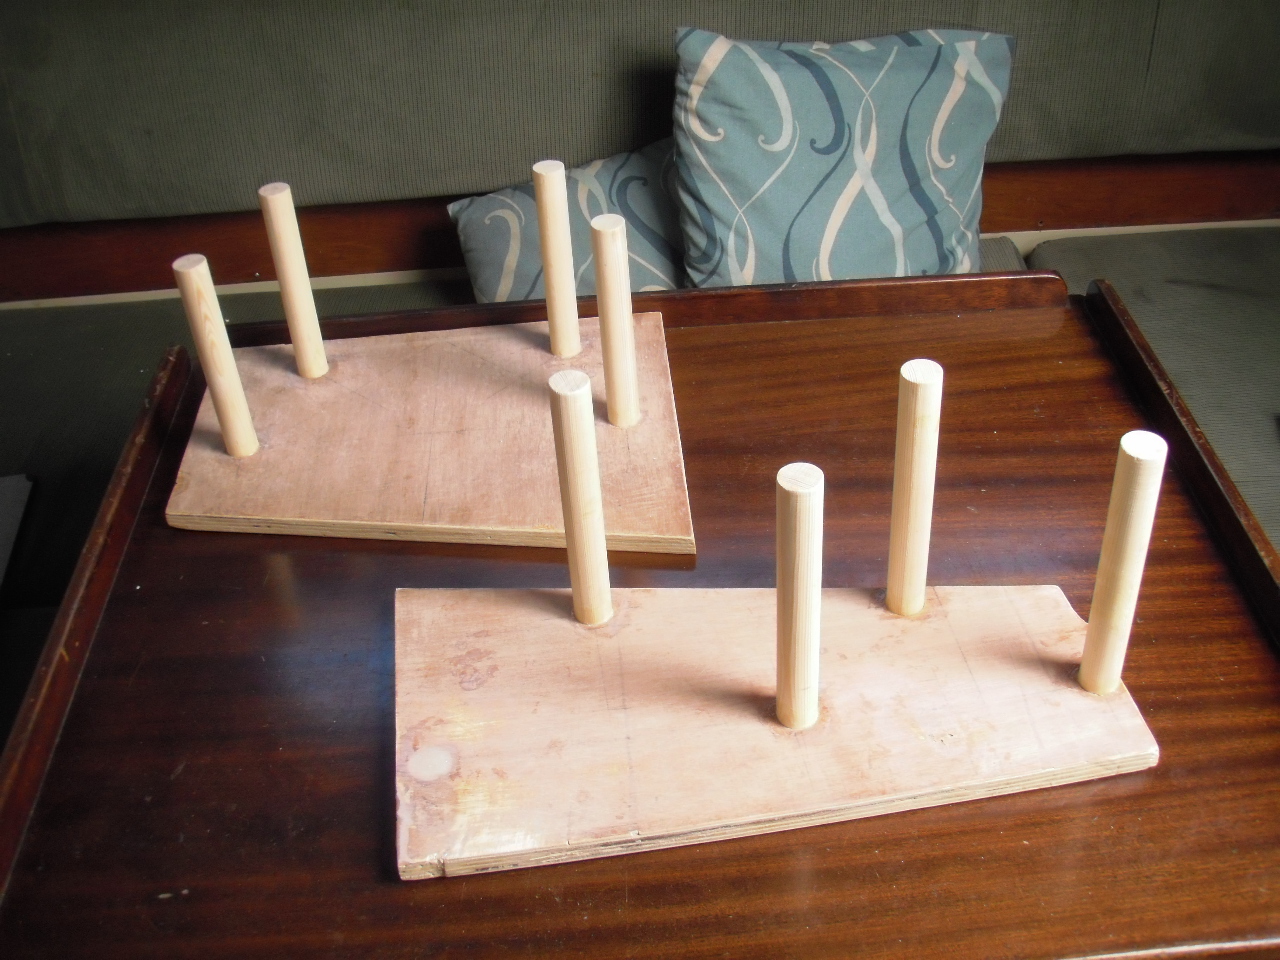
I have been giving some thought to the crockery stowage in the galley once the items are put through the opening a means of preventing them from wandering about in what is a comparatively large space I eventually came up with the arrangement in the photograph below once these have been painted I can then finish off in this area.


The idea being that these will be installed behind the front panels to restrain the crockery I took a bit of a guess with the sizes just hope that I can find something that will fit when the time comes.

For the remainder of the week I have been making up some more timber trim for the new panels in the saloon and galley areas no pictures I am afraid the aim is to try and get some varnish on them over the weekend.

I have done a bit more wiring namely the domestic water pump which now works just needs some plumbing and water tanks to complete and also the 12 volt supply to the wind instrument junction box, as posted previously I can't do any more with this until the mast is up.

To finish off today I started making the doors for the heads locker and the wine locker these will be the same arrangement as the galley lockers I have fitted all the plastic track ready for the doors. As an aside I sourced the track from Amazon and as well as the usual product review request message I got a message from a guy who wanted to know if I thought the track would be suitable to retain the glass in his snake tank now I don't know about you but I know very little about snakes other than some are harmless and some are dangerous and as he didn't give any indication as to his particular snakes are how do you answer that one?


Friday, 28 April 2017

Keel bolt success or brute force applied with a modicum of intelligence

Now that the keel bolt had moved I was reasonably confident that I would be able to get it out a further search through the toolbox produced a couple of old 'King Dick' sockets they were only 1/2" drive but I thought I would risk it. First thing Monday morning I hammered the socket onto the remains of the head and using a couple of adaptors I managed to reduce the 1" drive of the 65:1 drive output to the 1/2" of the socket and started to turn the input and the bolt started to move using the drive kept the socket square and stopped it slipping on the bolt and eventually it came out. I was a little perturbed when the bolt came out as I could see daylight in the bottom of the hole but on further inspection it appeared that the hole in the keel flange may have originally been drilled right through and then sealed over on the outside.


Keel bolt

As can be seen the threads are in surprisingly good condition only the hexagon head is missing driving the socket on gave it an almost splined head, the barrel shape of the remains of the head made it difficult to keep the ring spanner straight which led to it slipping and chewing up the head with the socket drive it was much easier to hold the socket square which reduced the tendency to slip. The bolts are 11/8" UNC which fortunately is still readily obtainable albeit the one I got is a bit long but it can easily be cut down.


New and the old

Last weekend I cut out the holes in the worktop for the galley sink and the taps so once the euphoria of getting the keel bolt out had worn off I got on with fitting the worktop and sticking it down as with the heads worktop I stuck it down with PU40, half the price of Sikaflex, adhesive sealant from Toolstation and once it had cured I secured the sink in the same manner then connected up the waste and fitted the mixer tap.


Trial fit


Sink and taps installed


Sink waste connected

The two flexible pipes are the hot and cold tails for the mixer tap that is as far as it goes at the moment until I start the hot and cold water installation. I ran the cables to the shower drain pump and made a temporary connection to test the waste arrangement it all seems to work quite well the pump still requires a manual switch fitting in the heads to complete the installation.

After reading a previous blog post my youngest daughter offered to arrange for the supply of the labels for the electrical switch panels from a company that she uses in her professional capacity. Just a matter of producing an auto cad drawing emailing it to the company who laser cuts them and then waiting for the postman to deliver them, they arrived this week so it was just a simple peel and stick operation to fit them.


Switch panel labels

To finish off the week I have started on the internal arrangements for the crockery stowage it needs a means of stopping the stuff moving about once it has been put through the slots I am working on the idea of a ply base with vertical dowels to restrain the crockery not much to see yet just some bits of ply.

The homework job this weekend will be to cut the new keel bolt to length and produce a new backing plate for it so that I can hopefully put it all back together next week and reinstate the watertight integrity of the boat and although I have been aware for some time that the keel bolt would need to be replaced the hole in the bottom was one of those one step backwards moments which touch wood there haven't been very many of to date.


Friday, 21 April 2017

Keel bolt

Most of the keel bolts are in reasonable condition I have removed the rust where necessary and given them a coat of rust treatment and painted them however there is one in the battery locker which has a heavily corroded head and the plate washer has completely disintegrated I suspect that there may have possibly been a spillage of battery acid which has eaten away the bolt head and plate whatever the cause this bolt needs to be replaced. I have borrowed some heavy sockets and a 65:1 geared socket drive. these were originally intended for the removal of lorry wheel nuts but ideal when a great deal of effort is required in a confined space as to reach the bolt with a socket would require two extension bars and the consequent loss of effort that this arrangement brings.


65:1 Socket drive


Keel bolt note absence of plate 

For the first attempt at removing the bolt I chipped off as much rust as possible and then found a socket which was a tight fit on the head of the bolt and hammered it on and then fitted the geared drive.


65:1 socket drive in place

I applied a spanner to the input of the drive and started turning the socket started moving but all that happened unfortunately was that it rounded off the bolt head and as I had not got a smaller socket that I was willing to drive onto the bolt It was a case of retire and think of a plan 'B'. 

While thinking about plan 'B' I got on with painting some of the locker fronts panels for the heads and the galley and started lining the crockery stowage and the wine locker with some of the van lining carpet off-cuts that I had left over from the headlining no photographs I am afraid.

After searching through my toolbox I came up with plan'B' for the keel bolt I had some short flogging ring spanners which I hadn't used in anger probably for about 45 years and so today I had another go at the keel bolt. After selecting a ring spanner which would be a tight fit I hammered it onto the remains of the bolt head and proceeded to try and loosen the bolt and after much effort I managed to turn it about one turn in the right direction all the time hoping that I would not shear off the head. By the time that I had moved the bolt that far the head was getting more rounded off and the spanner refused to grip it so I gave up for the day I will need to dress the bolt head and fit a slightly smaller spanner for the next attempt.

To finish up the day I marked out the galley worktop for the new sink which had arrived on Wednesday the intention being to cut out the openings for the sink and the mixer tap over the weekend. All in all its been a bit of a frustrating week with only limited progress but hey ho these things happen.


Friday, 14 April 2017

Odds and ends

This week amongst other things I have been catching up on one or two small jobs which need to be done the first was to re-bed a port side stanchion base this one was the only one which had not been removed by the previous owner and it had developed an annoying drip and so before I can finish the galley and heads storage it needed to be sorted. After removing the base I cleaned it up and then with some thickened epoxy I levelled up the inside bolting face, the nuts were almost fully recessed into the GRP which had been laid over the hull/deck joint.

While the epoxy was curing I cut out a timber stiffener to be glassed under the top of the galley moulding the idea was to make said moulding a bit more rigid and hopefully level up the top. The timber was bedded in with some thickened epoxy and held in place with a couple of screws through the top the epoxy that was squeezed out was formed into  fillet all round this was then left to cure.

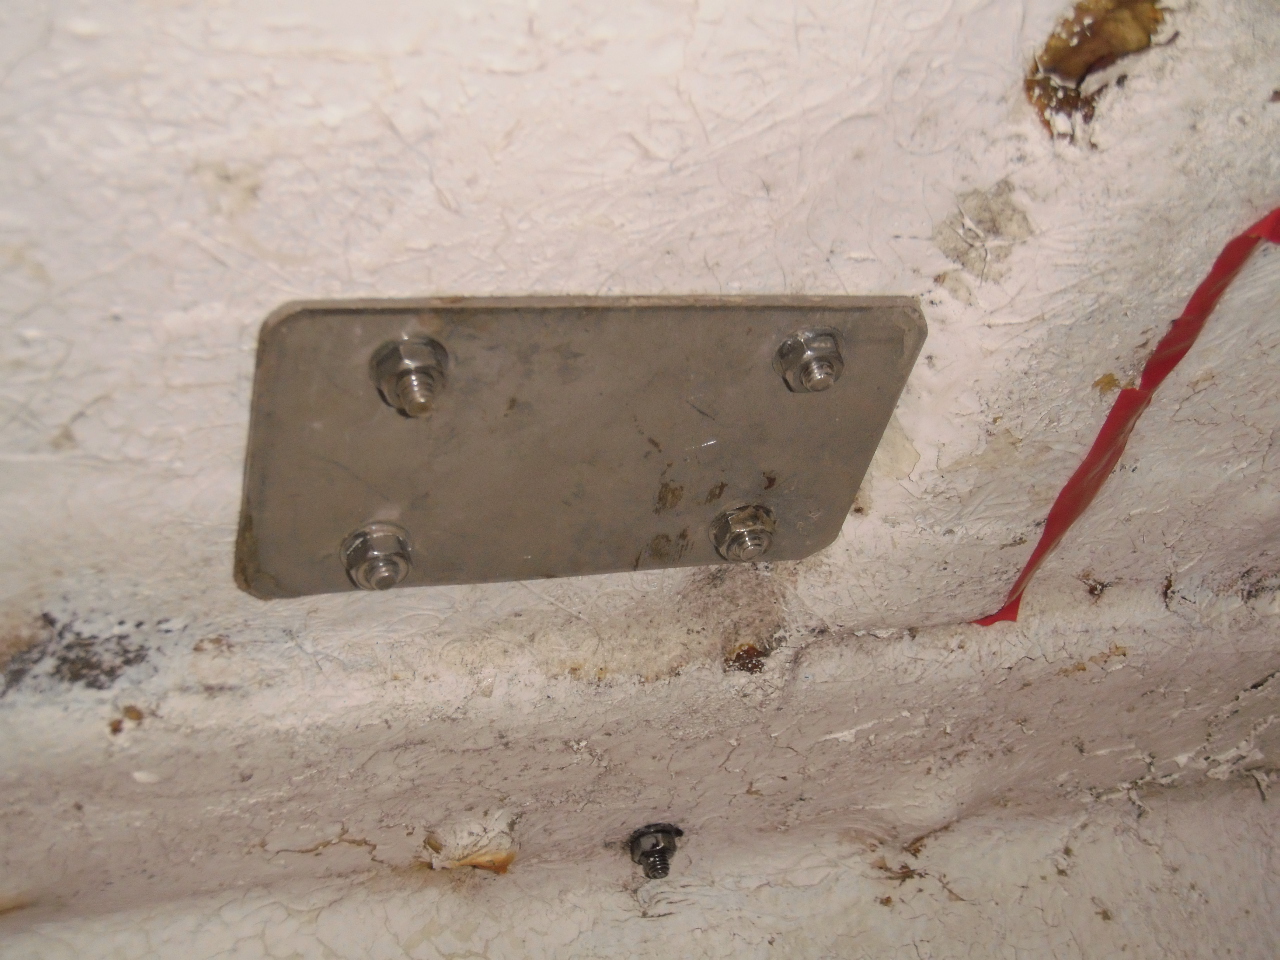
While I had some thickened epoxy mixed I got on with another little job which has been needing doing for some time the starboard midships cleat I had put both the port and starboard cleats on quite early on in the project and afterwards I identified what I took to be the backing plates in amongst all the other bits and pieces. I had fitted the port side plate some time ago but I was not happy with the starboard side as can be seen from the following photograph the two bolts to the right are in way of the deck stiffener such that they are splayed out and it is impossible to get the nuts up square to the underside of the deck but at the rime the main aim had been to seal the holes in the deck to keep the rain out.


Bolts for starboard midships cleat

After removing the cleat I decided to move it forward so that I could utilise two of the original bolt holes I then marked and drilled two new holes and secured the cleat and backing plate the two redundant holes were filled with some thickened epoxy.


Starboard midships cleat backing plate

On Tuesday I spent some time at home in the workshop and silver soldered the modified engine sea water pipe ready to fit.


Sea water pipe completed

The sea water pipe was fitted on Wednesday it is now complete except for a coat of green Hammerite to match the rest of the engine.


Modified sea water pipe fitted to the engine

The next task was to finish glassing in the reinforcement to the galley moulding I used a couple of layers of 100mm woven glass fibre tape and epoxy resin such that the timber was completely encapsulated.


Galley moulding reinforcement

The top of the moulding is now much more rigid and a lot closer to being reasonably flat apart from a bit at the back under the lockers but to do anything with this area would entail grinding out the tabbing which secures the moulding to the half bulkhead and the hull and then levelling up the top and refixing it, but as the worktop is 12mm thick solid laminate which is pretty rigid and most of the top is pretty level particularly in way of the sink and taps I decided that it would be good enough.

Today I ran in the waste pipe which connects the heads washbasin waste, the discharge from the shower drain pump and the galley sink waste to the sea cock as shown in the above photograph the tee is for the connection to the galley sink waste it still requires some jubilee clips to complete but I have run out at the moment I also need the galley sink and a hose tail to connect the hose to the heads washbasin waste I shall get these on order this weekend.


Shower drain pump connection

To finish up today I removed the starboard chain plates so that I could reseal them while there was a minor leak on the port chain plates the starboard ones were OK however at the moment they are easy to get at but once the internal refit is completed the job will be a little more awkward and sods law usually says if I don't do them now once I get the boat sailing things are bound to work a bit and they will then start leaking. I cleaned everything up and washed with acetone before applying a generous dollop of Sikaflex and then lowered the plates in and bolted them back to the bulkheads and then fitted the deck plates and pulled them down until the Sikaflex was starting to be squeezed out once it has cured I will harden up the screws in the deck plates.


Chain plates ready to be replaced


Sikaflex being squeezed out round the deck plates


Friday, 7 April 2017

Engine

First job this week was to clean out the fuel tank it wasn't too bad but while it was still easy to remove I lifted it out of the locker and removed the inspection plate to enable me to give it a good wipe round inside. To finish up I washed the tank out with some industrial strength detergent and fortunately it was a warm sunny day so ti did not take long to dry out.

After some consideration I decided that as there was already a hole in the forward end of the tank about one inch from the bottom I would utilise this for the fuel supply to the engine by fitting a tank connector together with a ball type isolating valve and a hose tail. These tanks are normally arranged with a fuel outlet at the top of the tank with an internal pipe as this pipe extends to the very bottom of the tank I decided that I would use this as the water drain by connecting a vacuum pump, when required, of the type used for sucking out engine oil.


Fuel supply to engine

Over the weekend I had modified the return fuel connection by silver soldering a purpose made hose barb to the end of the copper pipe as I am not keen on connecting hose directly to plain copper pipe with jubilee clips, yes I know lots of people do it and don't have any problems. Also I could then use the same size fuel hose that I had used for the engine supply for the return to the tank. The right angled hose tail was then fitted to the tank inspection plate and the fuel return hose connected up.


Hose tail silver soldered to the fuel return 


Hose connected


Fuel return connected to tank

The hoses to connect the tank to the deck filling point and the fuel tank vent are still to be fitted once I have the required hose but it will still be possible to put fuel into the tank and the cap is fitted with a vent so that I will still be able to test run the engine. Also I have fitted a simple mechanical fuel gauge to the tank I will probably change this for a remote reading electric gauge in the future.

I have turned down the hose tail for the engine sea water pump to take a 1" hose but this has not been connected yet as I will use a temporary hose into a bucket for test running the engine.

When I fitted the new engine exhaust elbow I had to remove the copper sea water pipe which ran from the oil cooler to the cooling passage on the gearbox as there was not room for both as can be seen in the photograph below the sea water connection from the oil cooler is on the left just above the red teleflex throttle cable. I had been thinking of using a flexible hose but after some thought I found that I could probably modify the existing copper pipe one end of which was somewhat corroded although the rest of the pipe appeared to be sound .


The new exhaust connection


The corroded end of the sea water pipe

By cutting off the corroded end and the addition of a couple of copper elbows I found that I could divert the pipe around the exhaust connection the use of a capillary type fitting effectively forms a hose barb and will make the flexible hose connection to the oil cooler a much more secure fit, the original end of the pipe was finished in a similar fashion. The pipe required the attention of a file as it was of a slightly larger diameter than standard 28mm pipe. The modified pipe is in the workshop waiting to be soldered together it will have to wait until next week as I am going sailing this weekend Conyer round to Ramsgate and back on a friends boat.


Modified pipe awaiting soldering

The final connection to be made is the sea water hose from the engine heat exchanger  via an anti siphon device to the sea water injection point on the exhaust connection the connection on the exhaust requires 32mm hose while the connection on the heat exchanger is a bit less and on the first attempt the jubilee clip would not compress the hose sufficiently to give a tight fit I will investigate further next week.

Finally to finish up today I started the pipework for the shower drain pump this will drain via an up and over loop into the waste from the heads wash hand basin which will also connect to the galley sink waste.


Shower drain pump


Shower drain pump strum box.

The bilge under the shower still requires a good clean and a coat of paint